
Building mobile apps with Vue Native

The mobile application market continues to expand in ways most of us never thought possible. The desire to enter this competitive (but profitable) market has left many organizations looking to learn more about Java, Vue.js, Angular, and Node.js. Here at InventorSoft, we are proud to provide both Front-End and Back-End Development, as well as design and quality assurance services. One of the frameworks we see more and more demand for is Vue Native.
What is Vue Native?

Vue Native is what we developers call a “mobile framework.” It is used to build mobile apps using the Vue.js framework. In layman’s terms, Vue Native is the platform upon which your app will be built. VueJS mobile represents the “materials” from which we’ll make all of the elements involved.
When we say “native” when discussing app development, we’re referring to the operating system on which a particular app is designed to run. So, where cross-platform software can work on Android, IOS, or web, native software works on only one at a time. This is beneficial as it allows the app to run much faster. However, it does pose some difficulties as well. Speaking of speed, one of the reasons Vue Native is so popular is that it saves tons of work hours by allowing user interface components to be reused for each operating system.
Getting Started with Cross-platform Mobile App Development
Let’s say you and your development team decide that cross-platform mobile is the way to go. If you’re committed to using Vue Native as your framework, there are some steps you need to take before you get started.
First, you’ll need to download and install some additional software. Mainly, you’ll need:
Android Studio – This can be found on the official website.
Xcode – This can be found at the App Store.
These programs are needed to ensure all the development tools you have can “talk to one another”. Trust us: they are invaluable to the app construction process.
To get Xcode, simply navigate to the Appstore, download the program, and install it on your system. Just be aware that the program is about 30GB, so make sure you free up some space. Now, Xcode doesn’t need any configuration, so you can leave it closed after the installation.
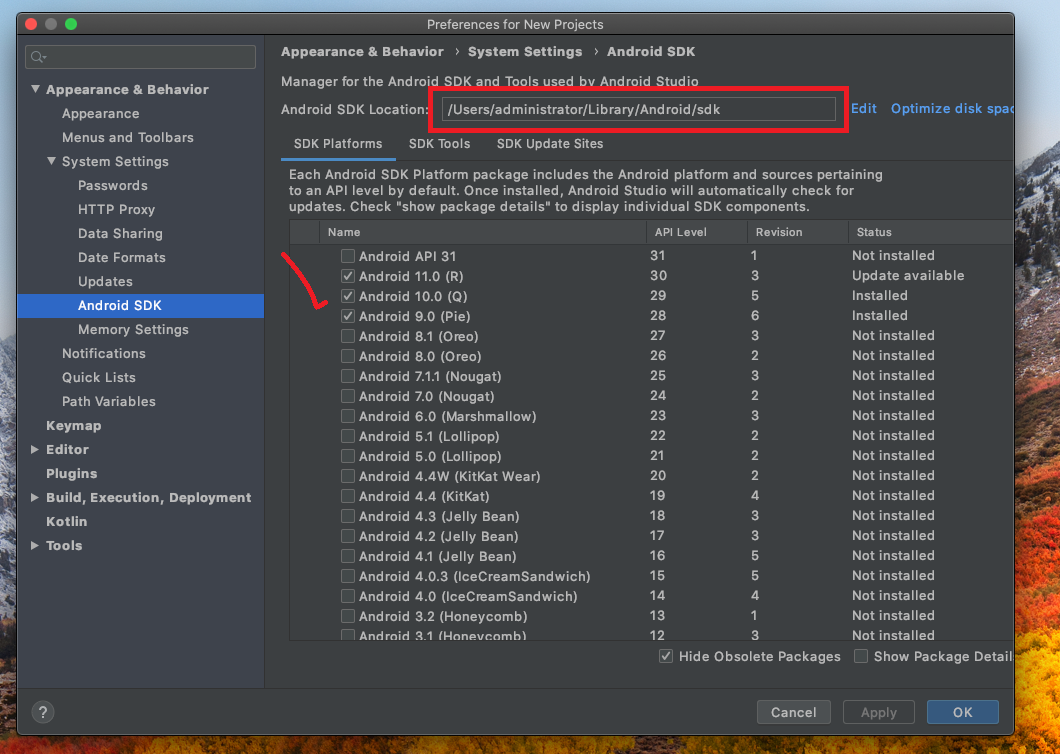
For Android Studio, navigate to the link above and download it from the site. Unlike Xcode, this application does need to be configured before you use it. To do this, open the program and go to the SDK manager. Here, you will need to install the Android platforms on which we’ll be working. We suggest Android 11, but if you want your app to work with more versions, you can add them as well.
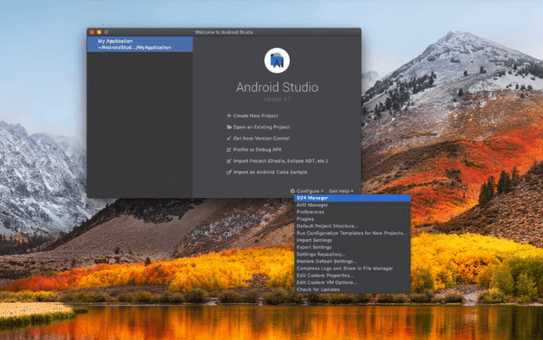
Now that you’ve configured the program, click on “Create Project.” Once the program boots up, run the project NPM. You’ll notice that the Xcode simulator will start running automatically as well.
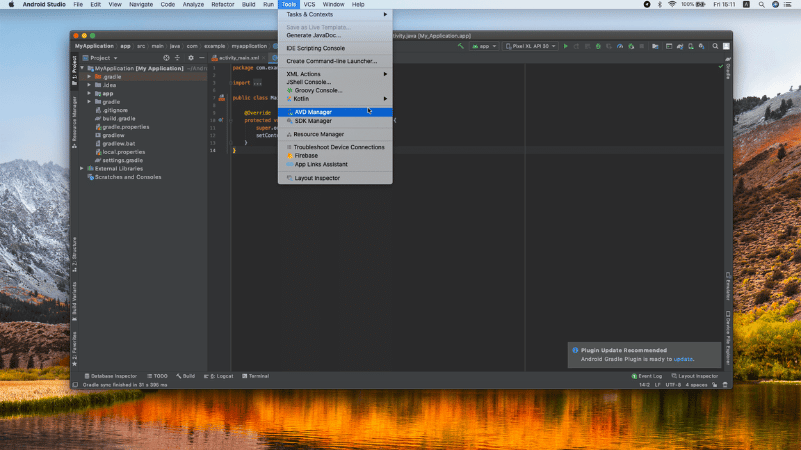
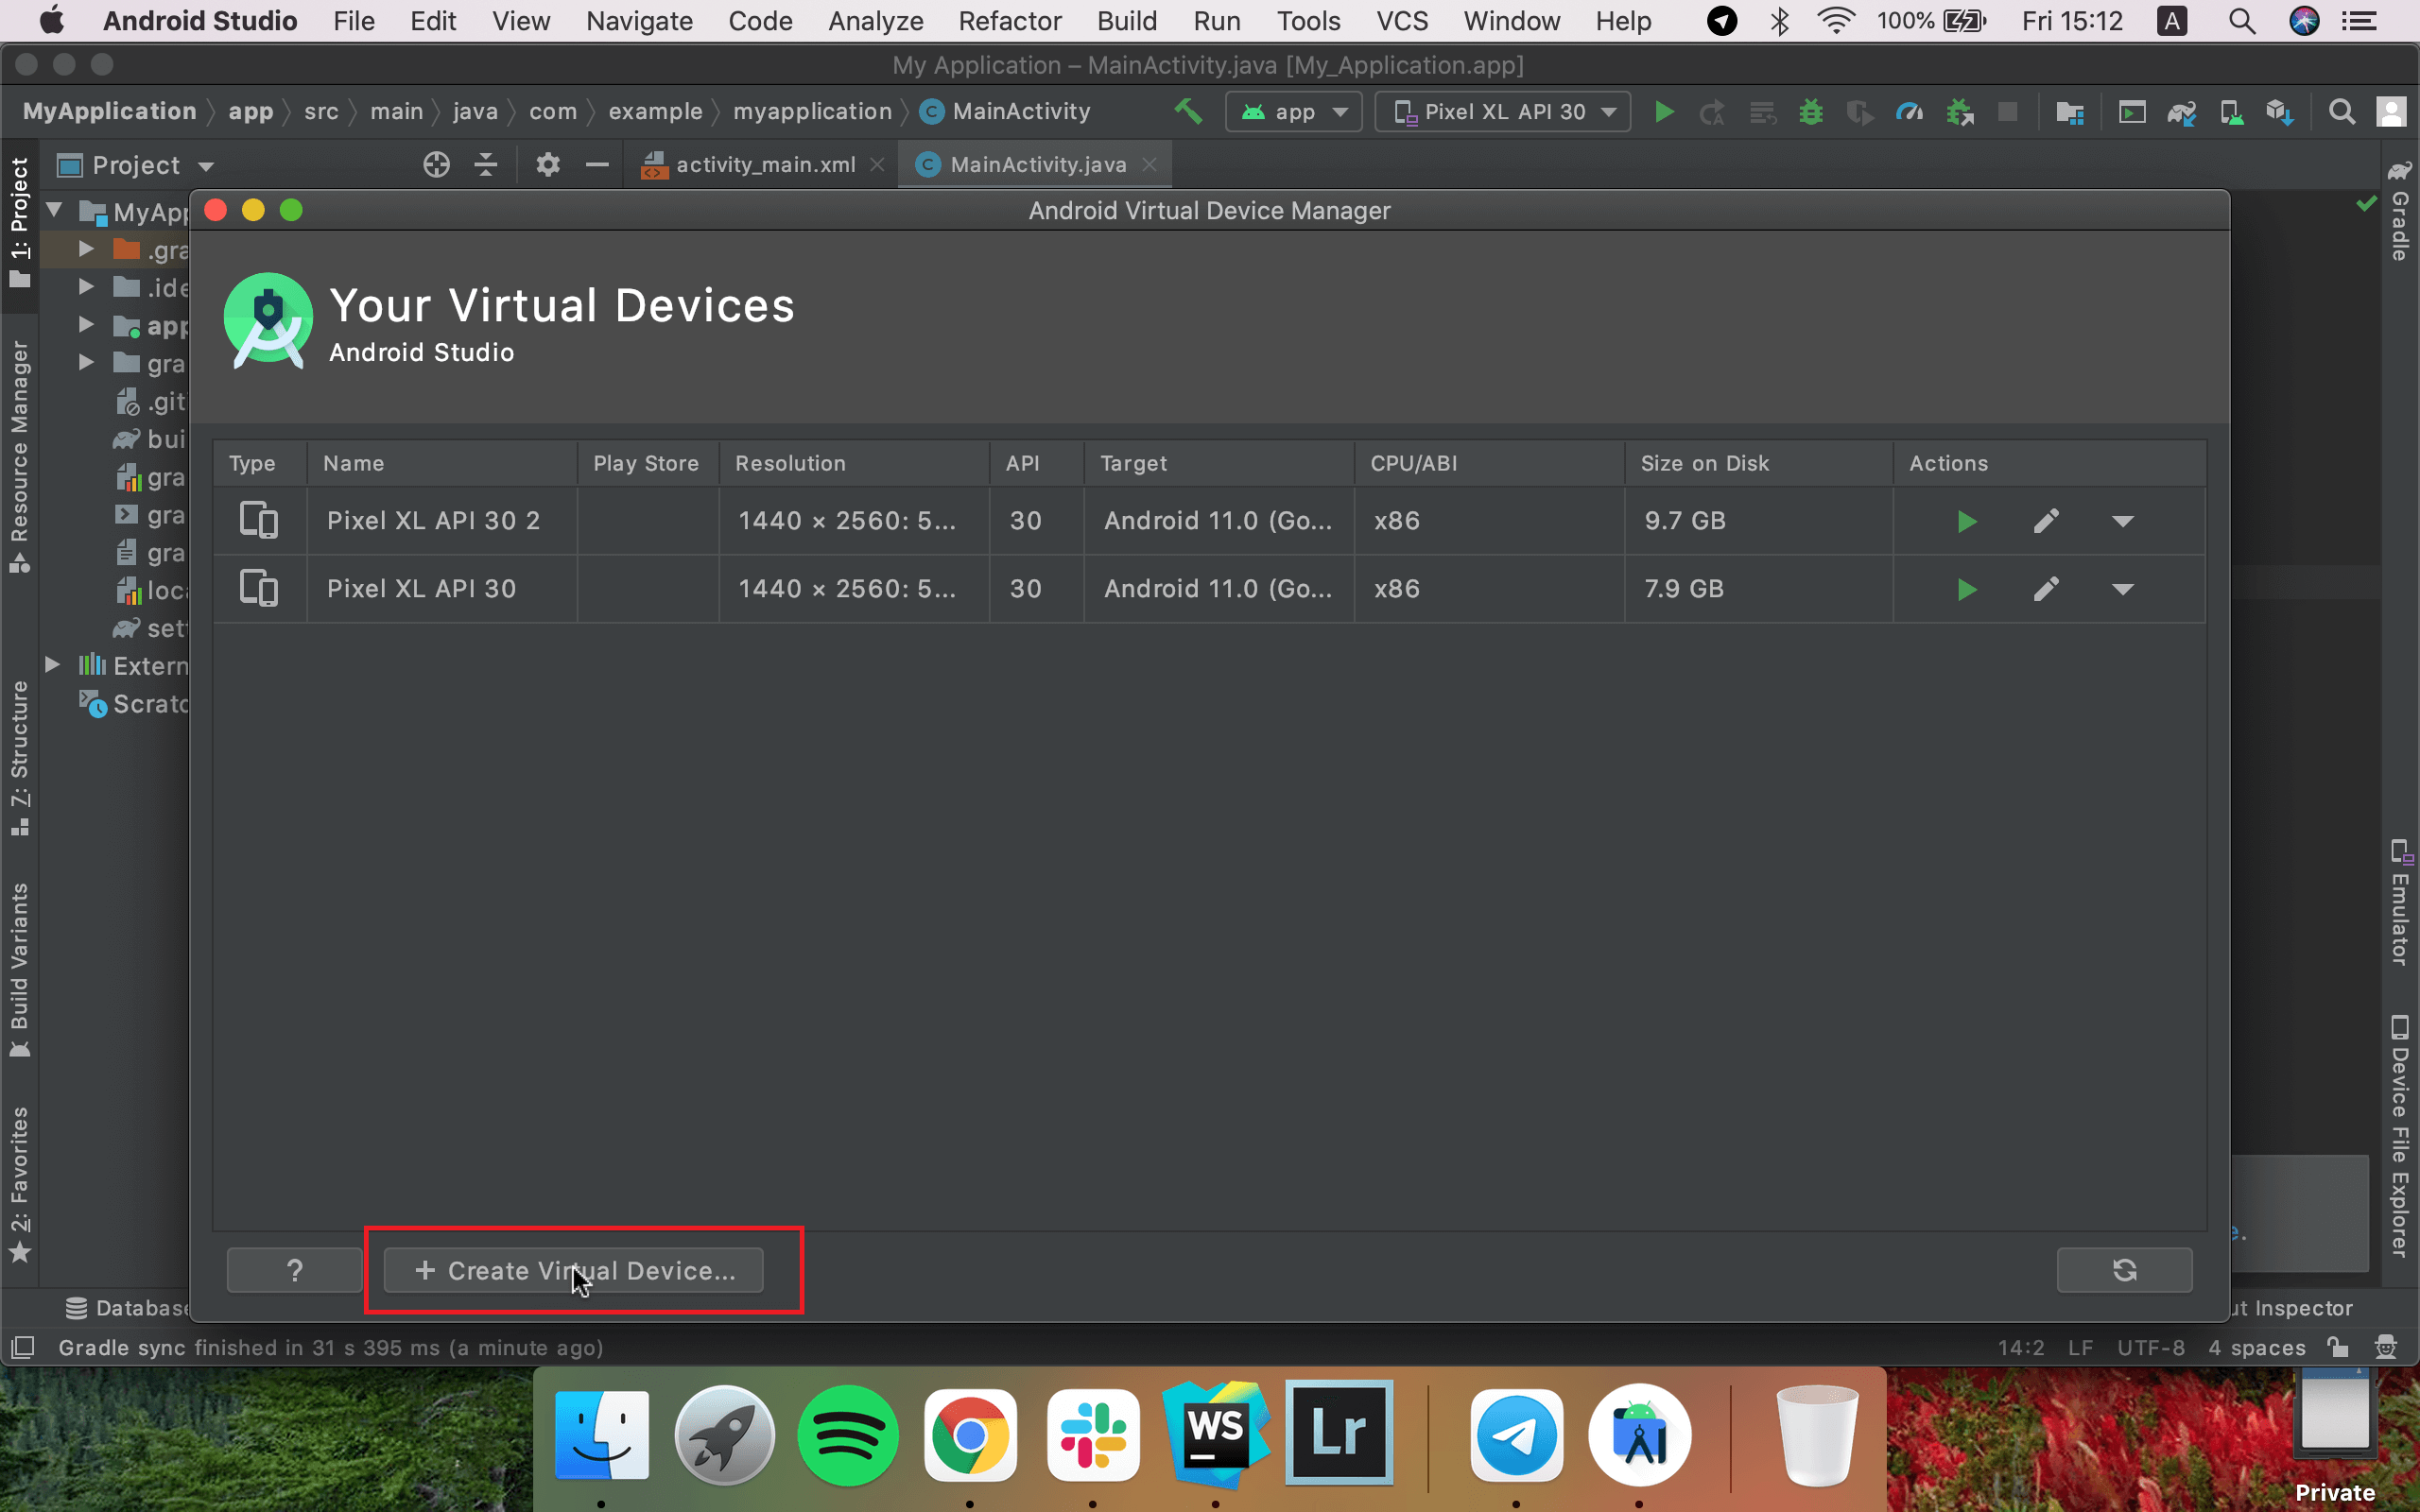
Next, you need to start the emulator inside Android Studio. To do this, navigate to Tools > AVD Manager and create a virtual device with which you can work. This can either be automatic, or you can create one of your choices.
Use Vue Native to Start Building Your Project
There is a Vue Native CLI (command line interface) that processes the commands you give to the program via lines of text. In this CLI, all the modules are automatically connected, and everything is configured as you initiate your project. However, it’s at this point that you need to consider how you want to work. There are two options to choose from:
1. Expo CLI
Expo CLI was specifically designed so that developers could quickly set up and use React Native applications. If your team has a web development background, this will likely be the best choice for you. It is widely supported and frequently updated. Plus, there are numerous modules that have already been created, so you don’t need to add anything manually. Simply connect and get to work.
2. React Native CLI
Unlike with Expo, there are no pre-set configurations that you can use to skip ahead. Instead, you need to register all the connecting modules, environments, and settings manually. However, if you need to connect a custom module for your project, React Native CLI is the way to go. Fortunately, the installation is quite simple. You just need to install the Node (npm install > global expo > cli or react-native-cli) and initialize the project.
Vue Native CLI
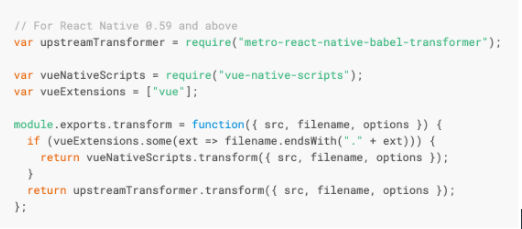
Now let’s discuss what you need to do to configure a React Native project for Vue Native. Keep in mind, you’ll need to write a vueTransformPlugin.js. This will allow you to actually move the project from the Vue.Native application into the React Native app. However, this must be done manually, or the project won’t start. Fortunately, the process is quite simple, as outlined below:
Step 1: Install Vue Native
$ npm install vue-native-core vue-native-helper –save
$ npm install vue-native-scripts --save-dev
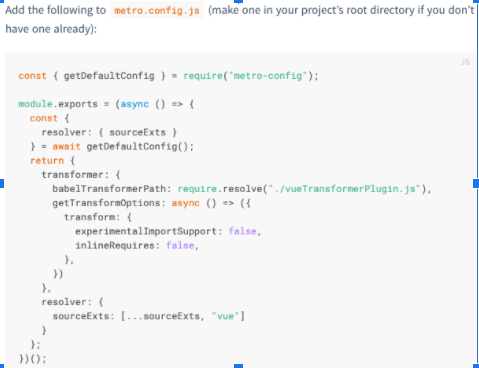
Step 2: Configure the React Native Packager
An Introduction to the Vue Native UI Components
The next step is to begin creating your project. To guide you through this process, we’ve included a number of screenshots. There are also tags in place (div, sections, etc.) to help you along the way. This is all explained in great detail in the Vue Native tutorial, which can be found here.
View (any wrapper / div goes through the view)
Text (similarly, the text is analogous to the headers h1, h2, and span)
Image
TextInput
ScrollView
Button
FlatList
ActivityIndicator
StatusBar
Switch
TouchableOpacity
WebView
UI Frameworks for Vue Native project
Similar to the Vue Native UI (Native Base), it greatly expands the program’s potential. It also adds a variety of new features, like the “Date Picker.”
Device APIs
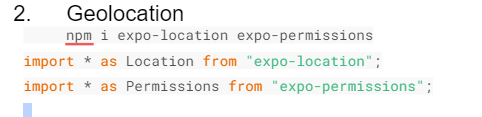
Of course, since this is a native framework, it is also compatible with Device APIs. For instance, it works with the camera, geolocation, accelerometer, and other built-in phone features. However, since these are not purely native applications, problems can arise with some modules (3D touch, Bluetooth, etc.).
That’s why it’s better to register everything manually and then update it. Here, you can see how to connect various modules. If you’re using Expo, the modules will all already be created. However, you’ll need to import them into your project manually.
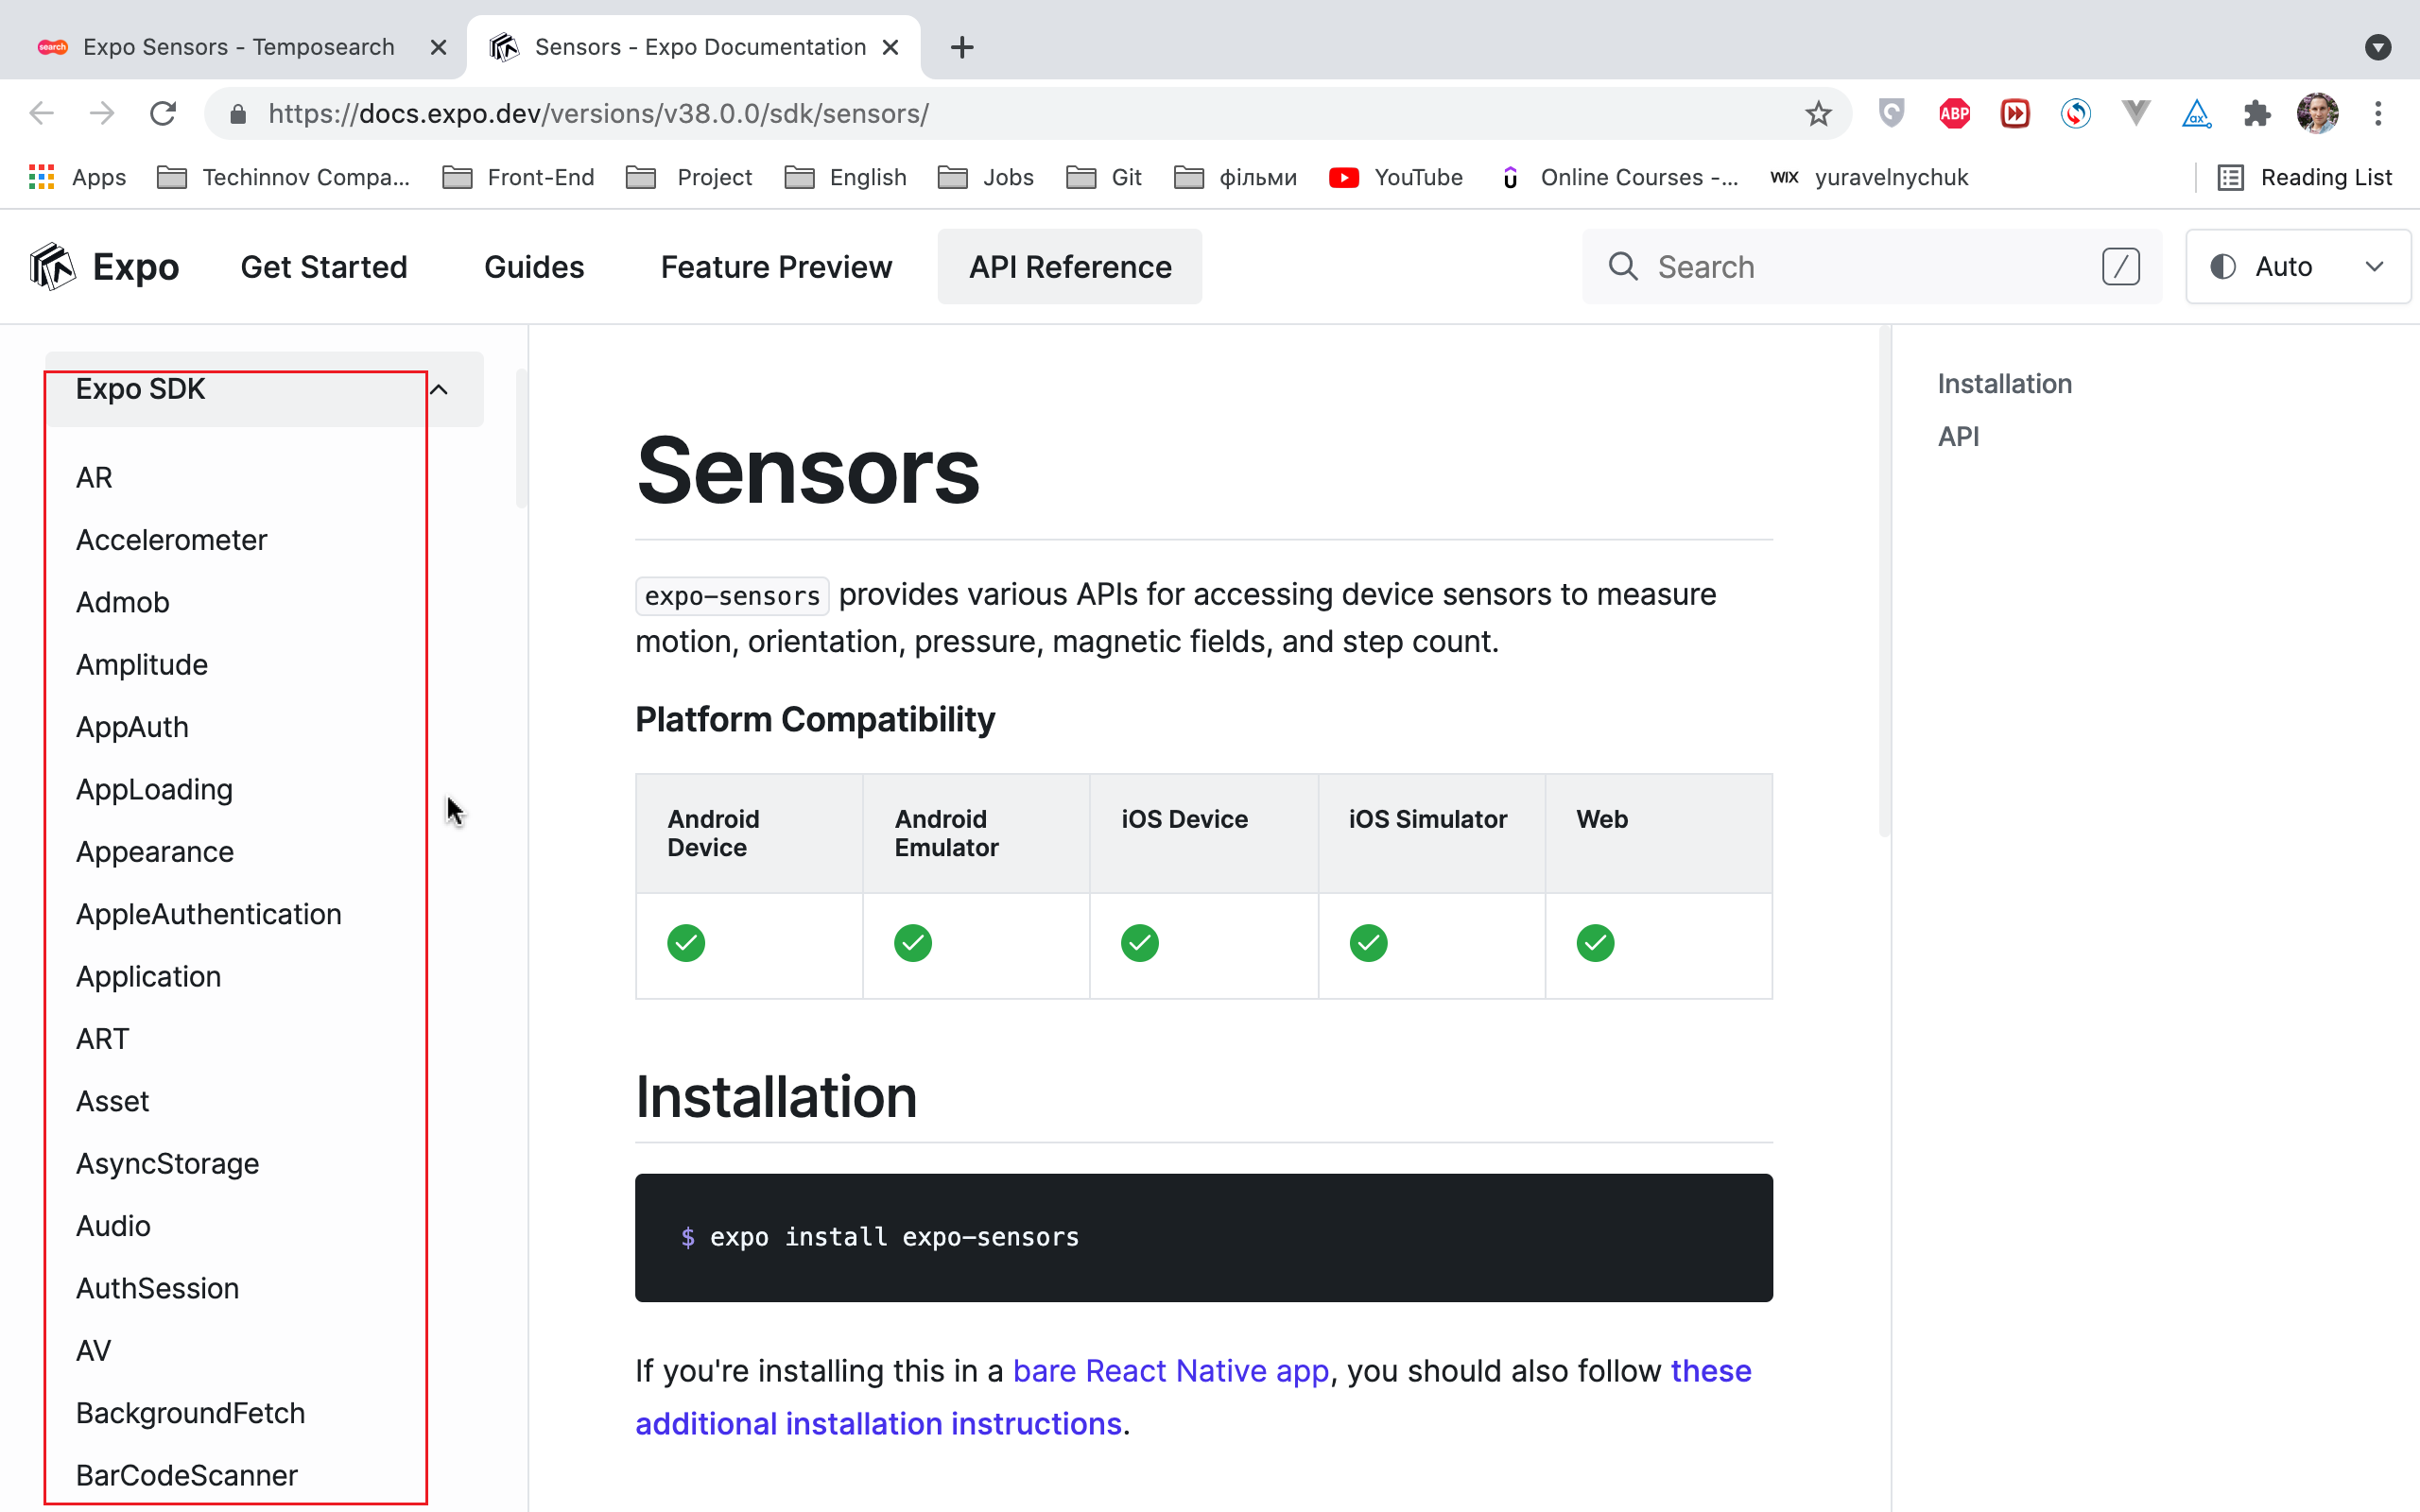
Try to remember that you can get a better description for each module under the React Native application. So, if you’re importing them into Vue, it’s smart to use the Vue Native app. Simply install the module and import it from Expo. Afterward, you can begin working with it right away.

Also keep in mind that some modules require permission.
The “Push notifications” module is a bit different. You need to create a base in React Native using Expo, where an API can be found.
Understanding the Vue Native Router
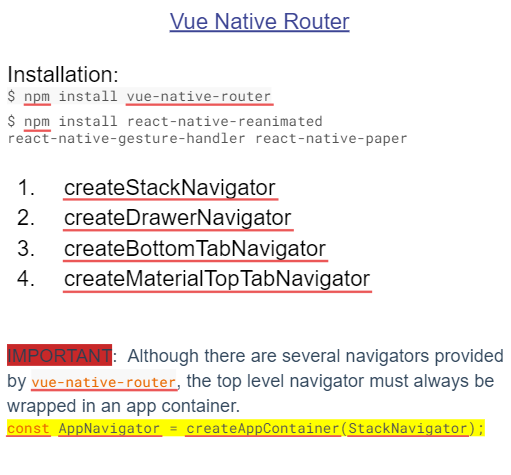
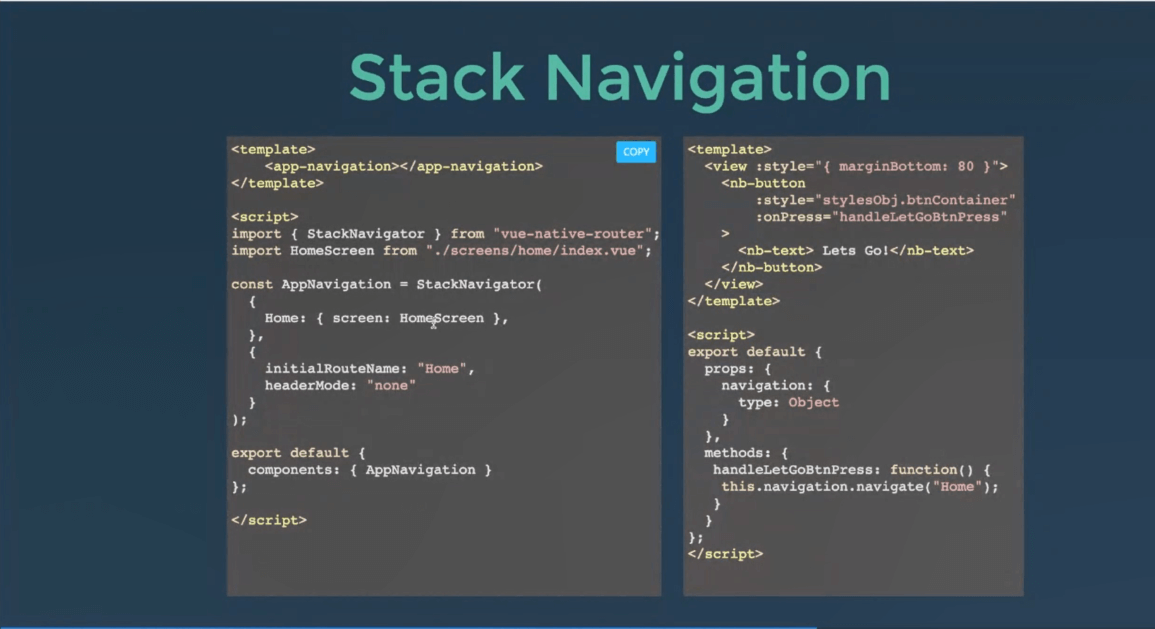
When it comes to the Vue Native router, there are four basic types. The primary one is CreateStackNavigator, which allows you to make a route by combining or “merging” certain screens.
For example, you can have one stack for a login page, registration page, forgotten password prompts, etc. However, as soon as you get further into the program by logging in, you will automatically move to the next stack.
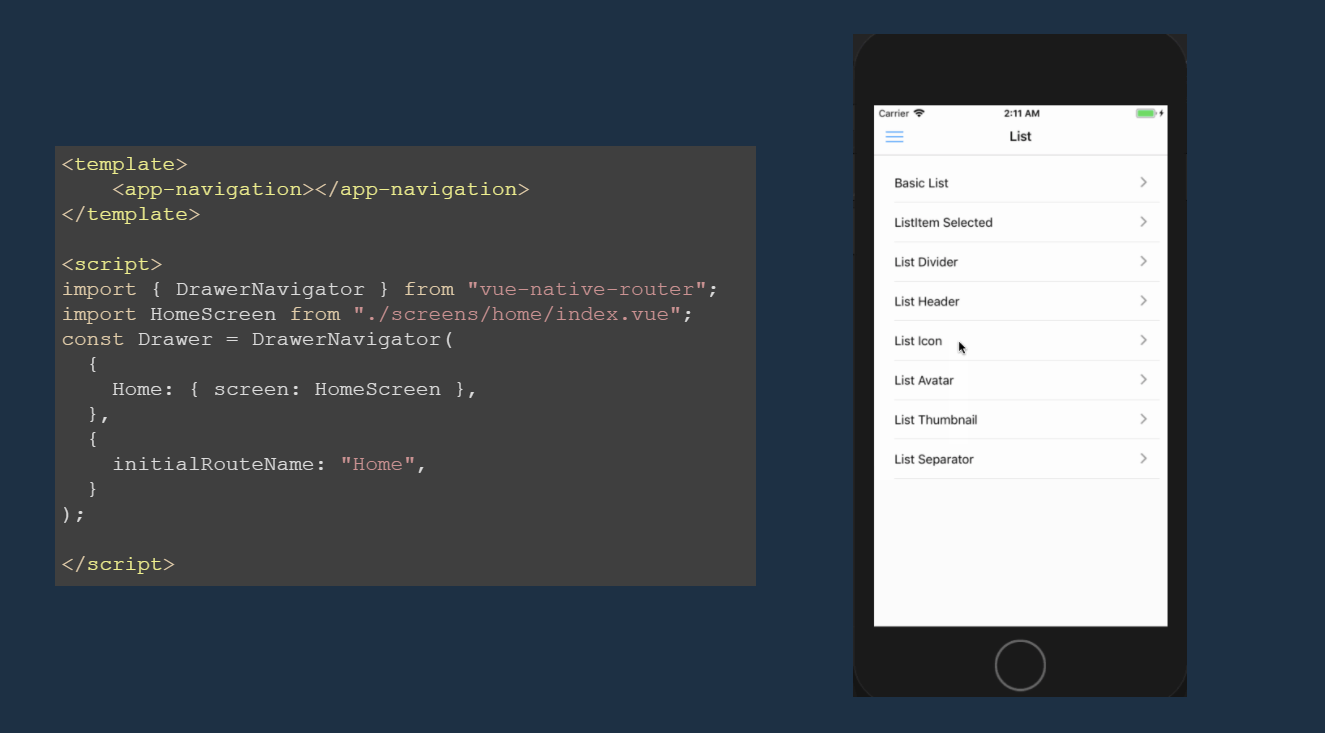
Then you have Drawer Navigator. This is a standard sidebar that combines links to specific stacks and allows you to transition between them.
With Drawer Navigator, you can create a single screen for one particular drawer. You also have the choice to separate it or use it as part of a stack.
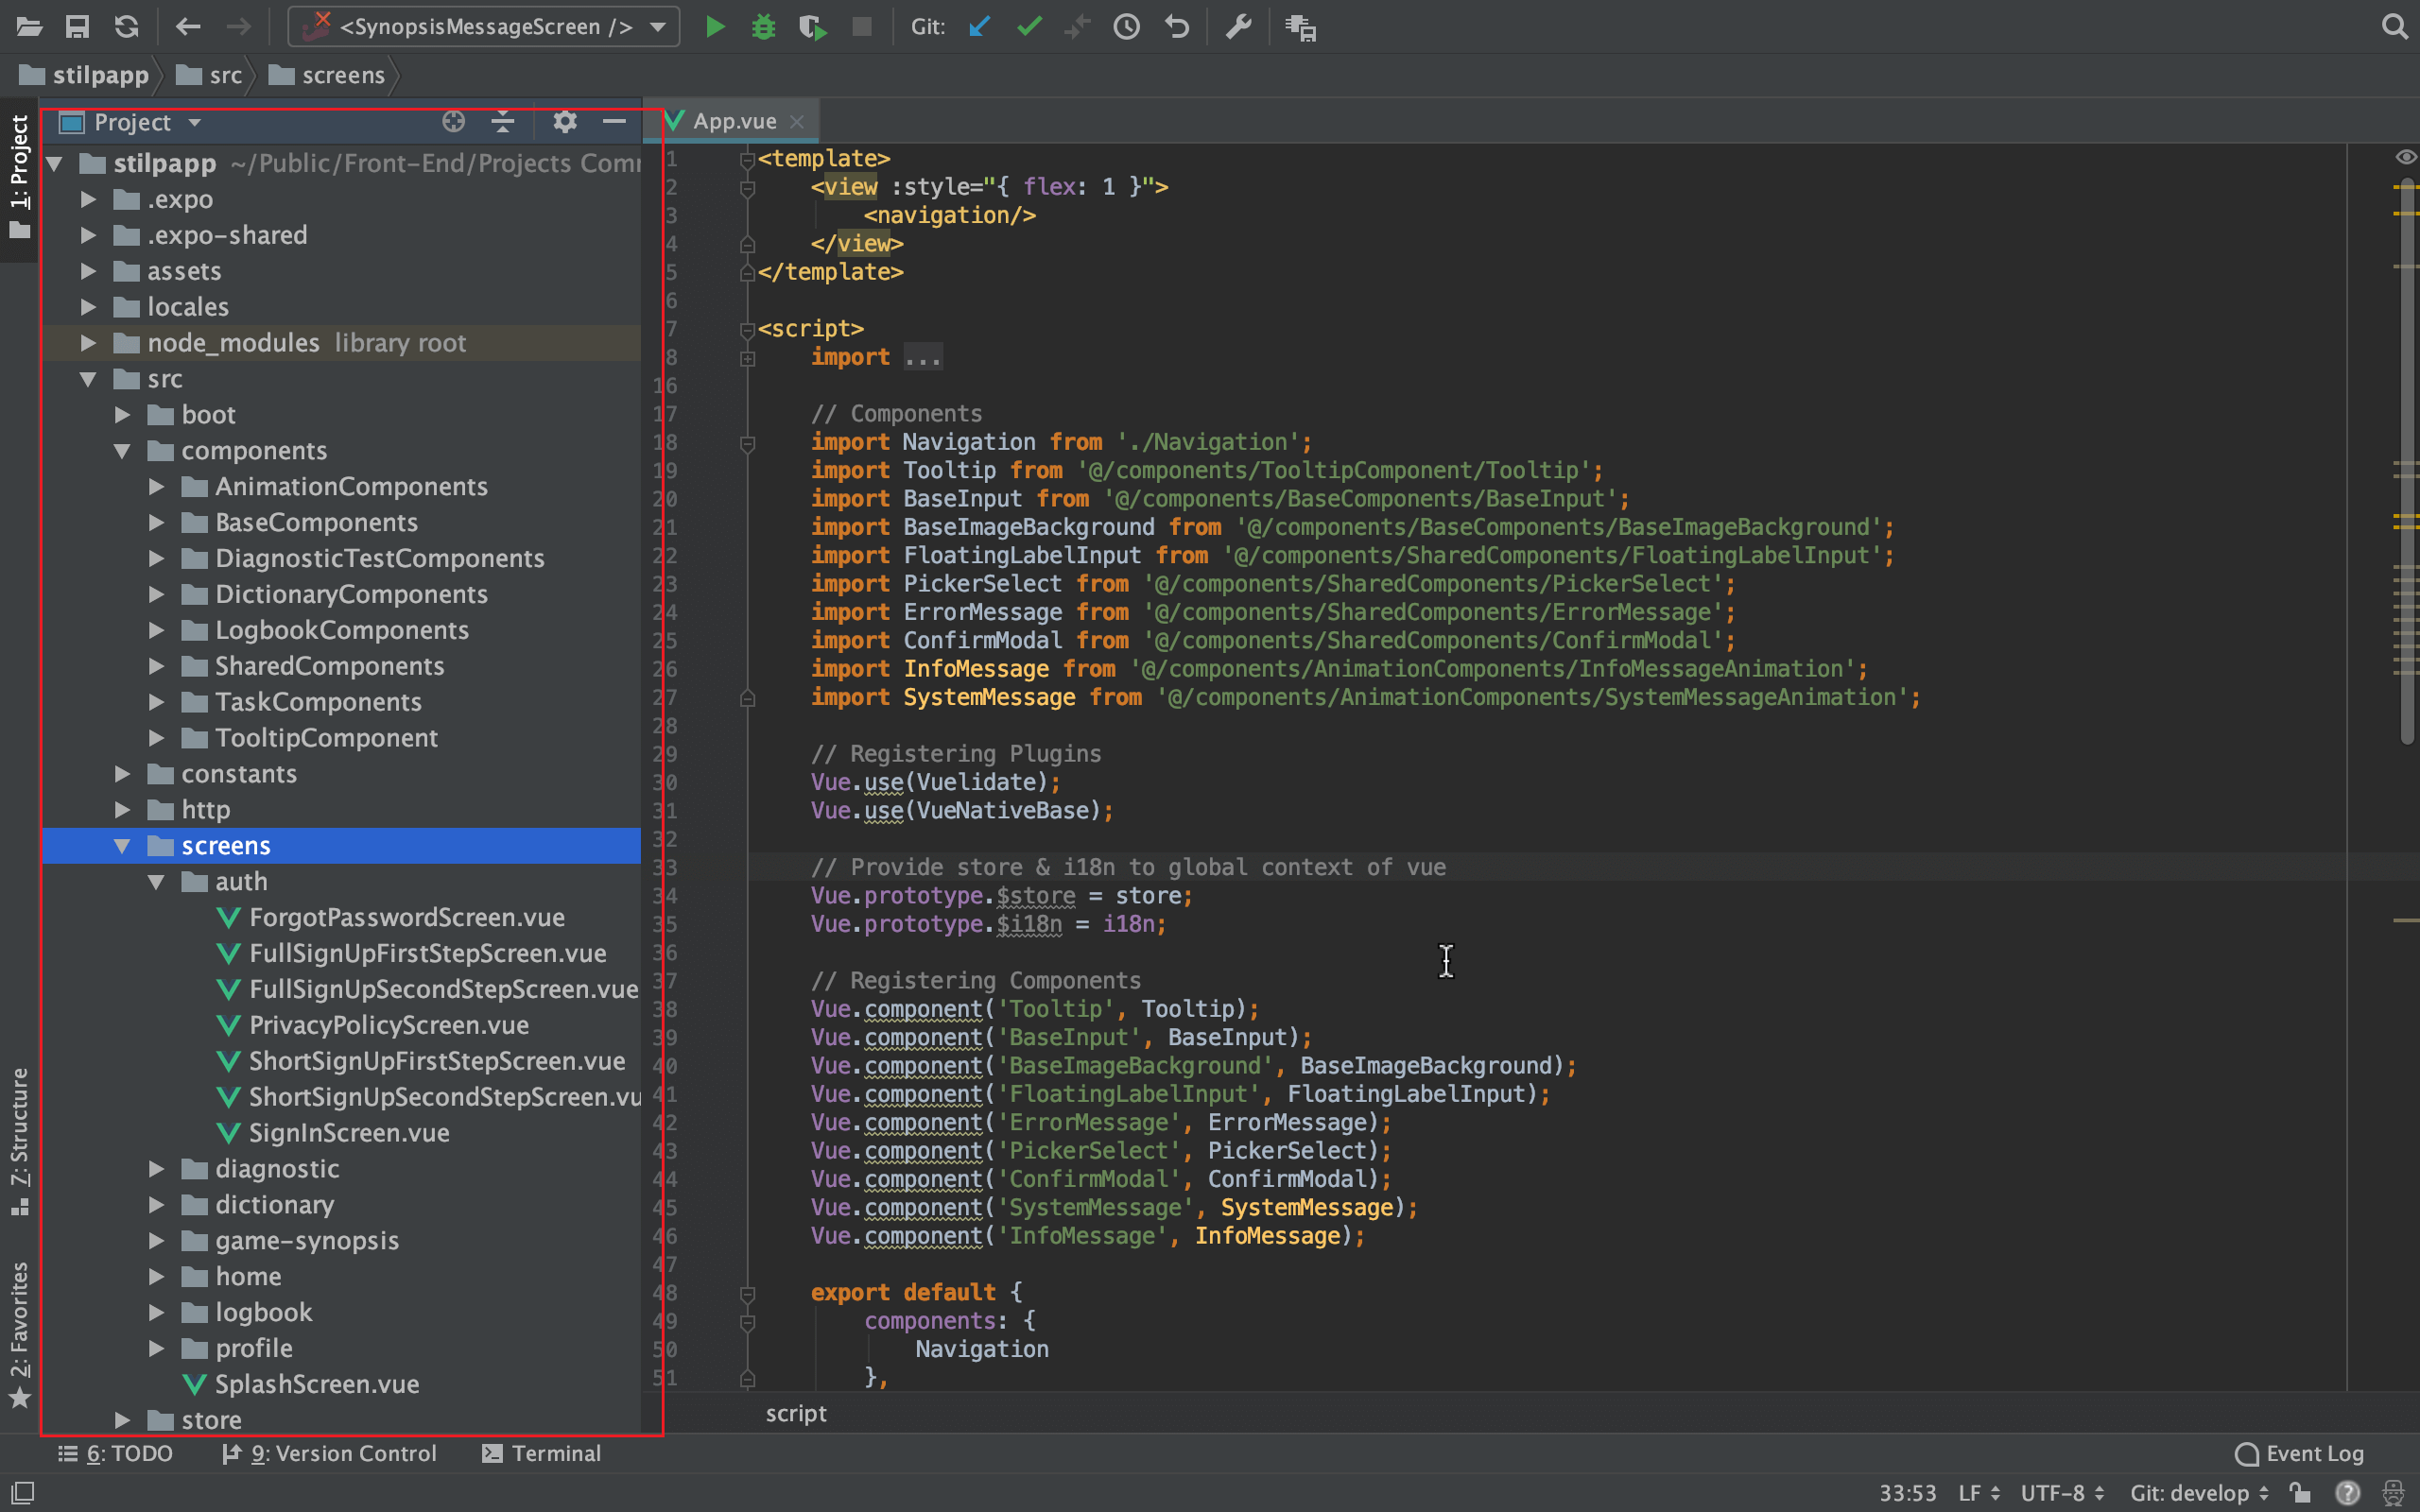
Here, we’ve created an example using the Op Lentus SIM-SLO application. As you can see, each button in the navigation bar represents the union of a particular stack.
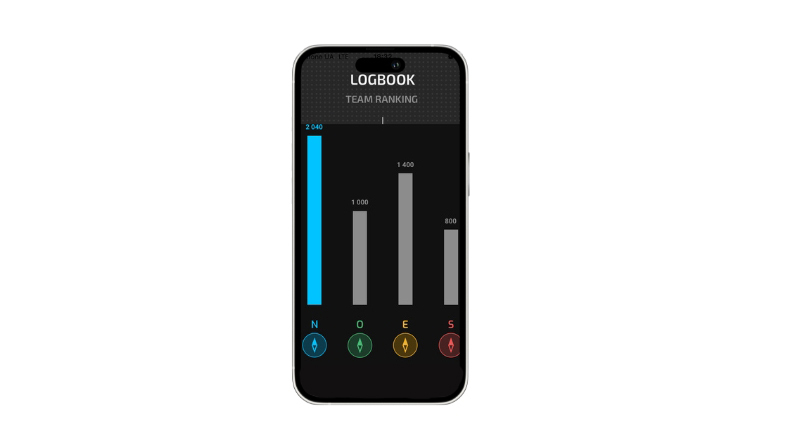
Also, all the separate stacks have been merged into the bottom navigation bar. This makes it easier to work on multiple areas at once.
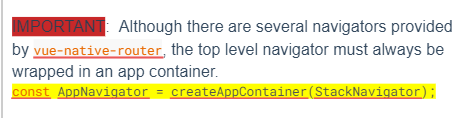
A prerequisite for navigation is that any stack or union needs to be placed in the createAppContainer. This allows you to navigate to the stack from your application’s backend, which will begin building the route of your program.
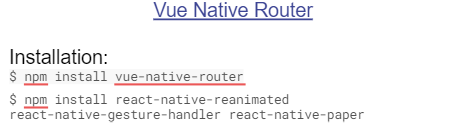
Our navigation goes through individual modules. This means that you would need to set the Vue Native route and install three libraries (reanimated, gesture handler, and paper) to help the router function more smoothly.
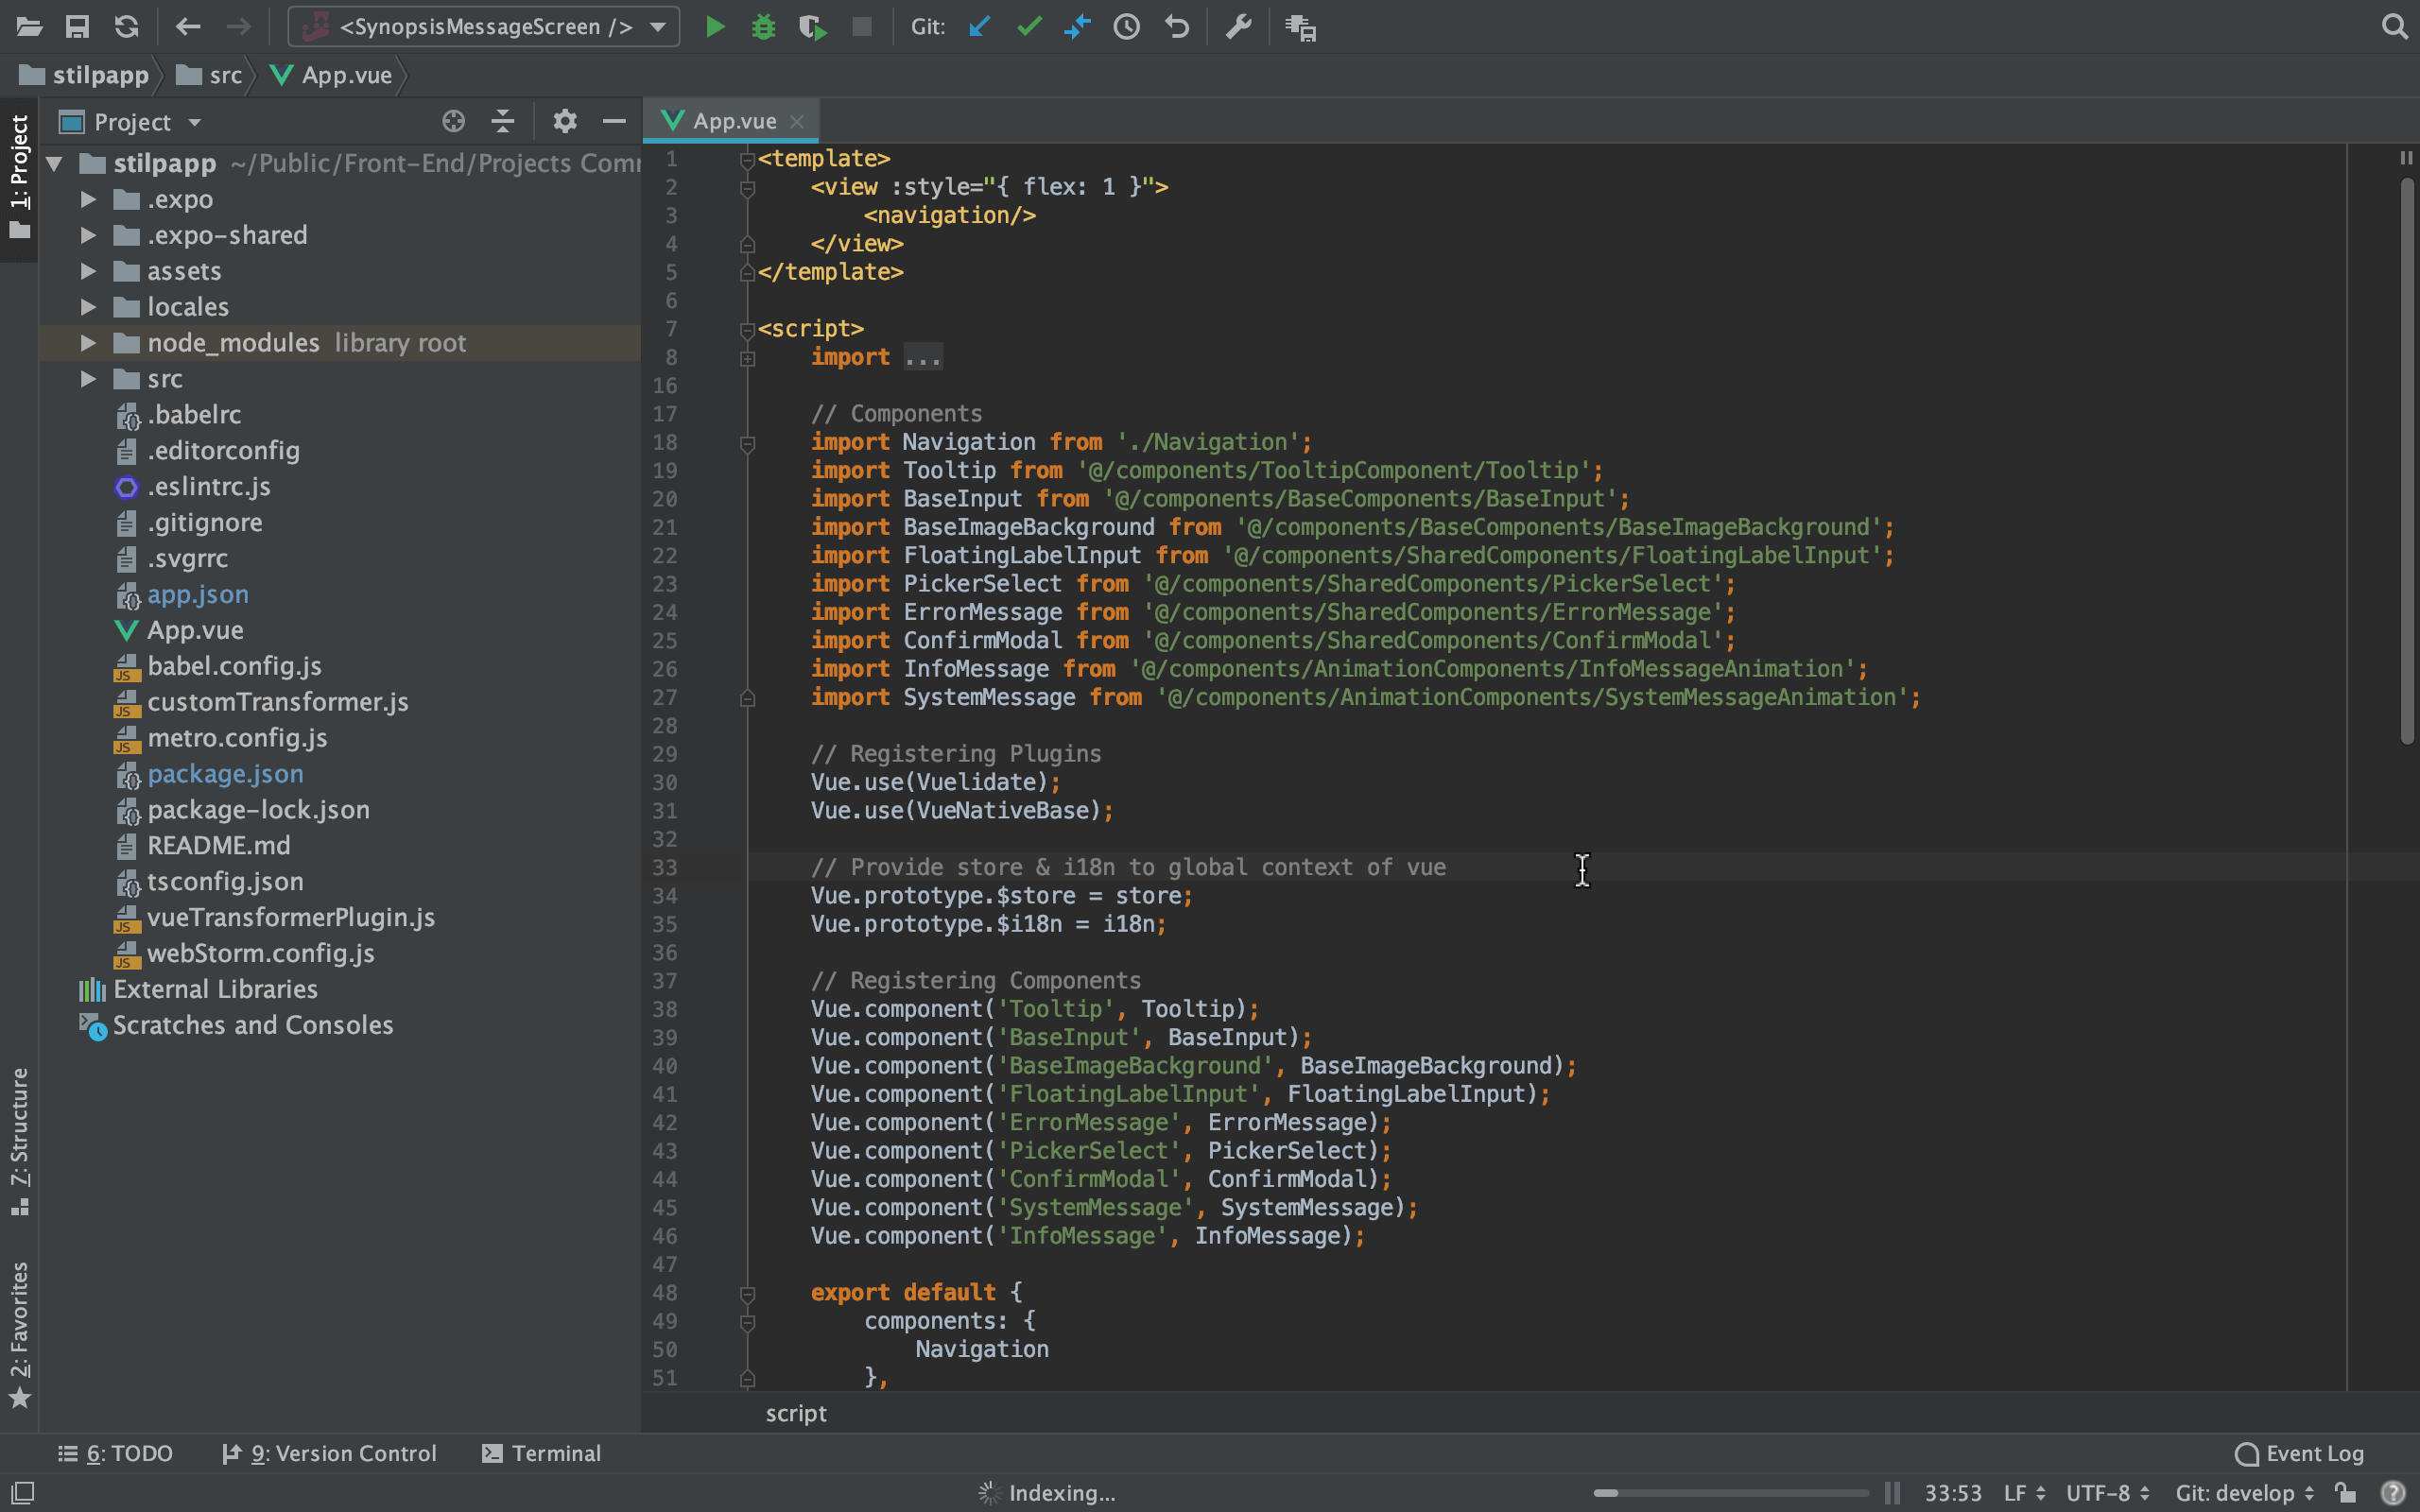
Here is how that looks in code form. You simply create an application, and the whole structure is established through the Vue Native CLI. Next, you will work with the alikes to write the main, view, and navigation.
When building the Op LENTUS SIM-SLO application, our programmers split everything into separate stacks of screens, each with its own navigation. In some cases, you have to work with React Native when doing this. For instance, we did so in order to solve some problems we were experiencing, creating separate stacks that we collected into one MainNavigation = createAppContainer.
When you make individual modules, you can also create screens. This is the merging of the individual pages we discussed before, such as the authorization, login, forgotten password, etc.
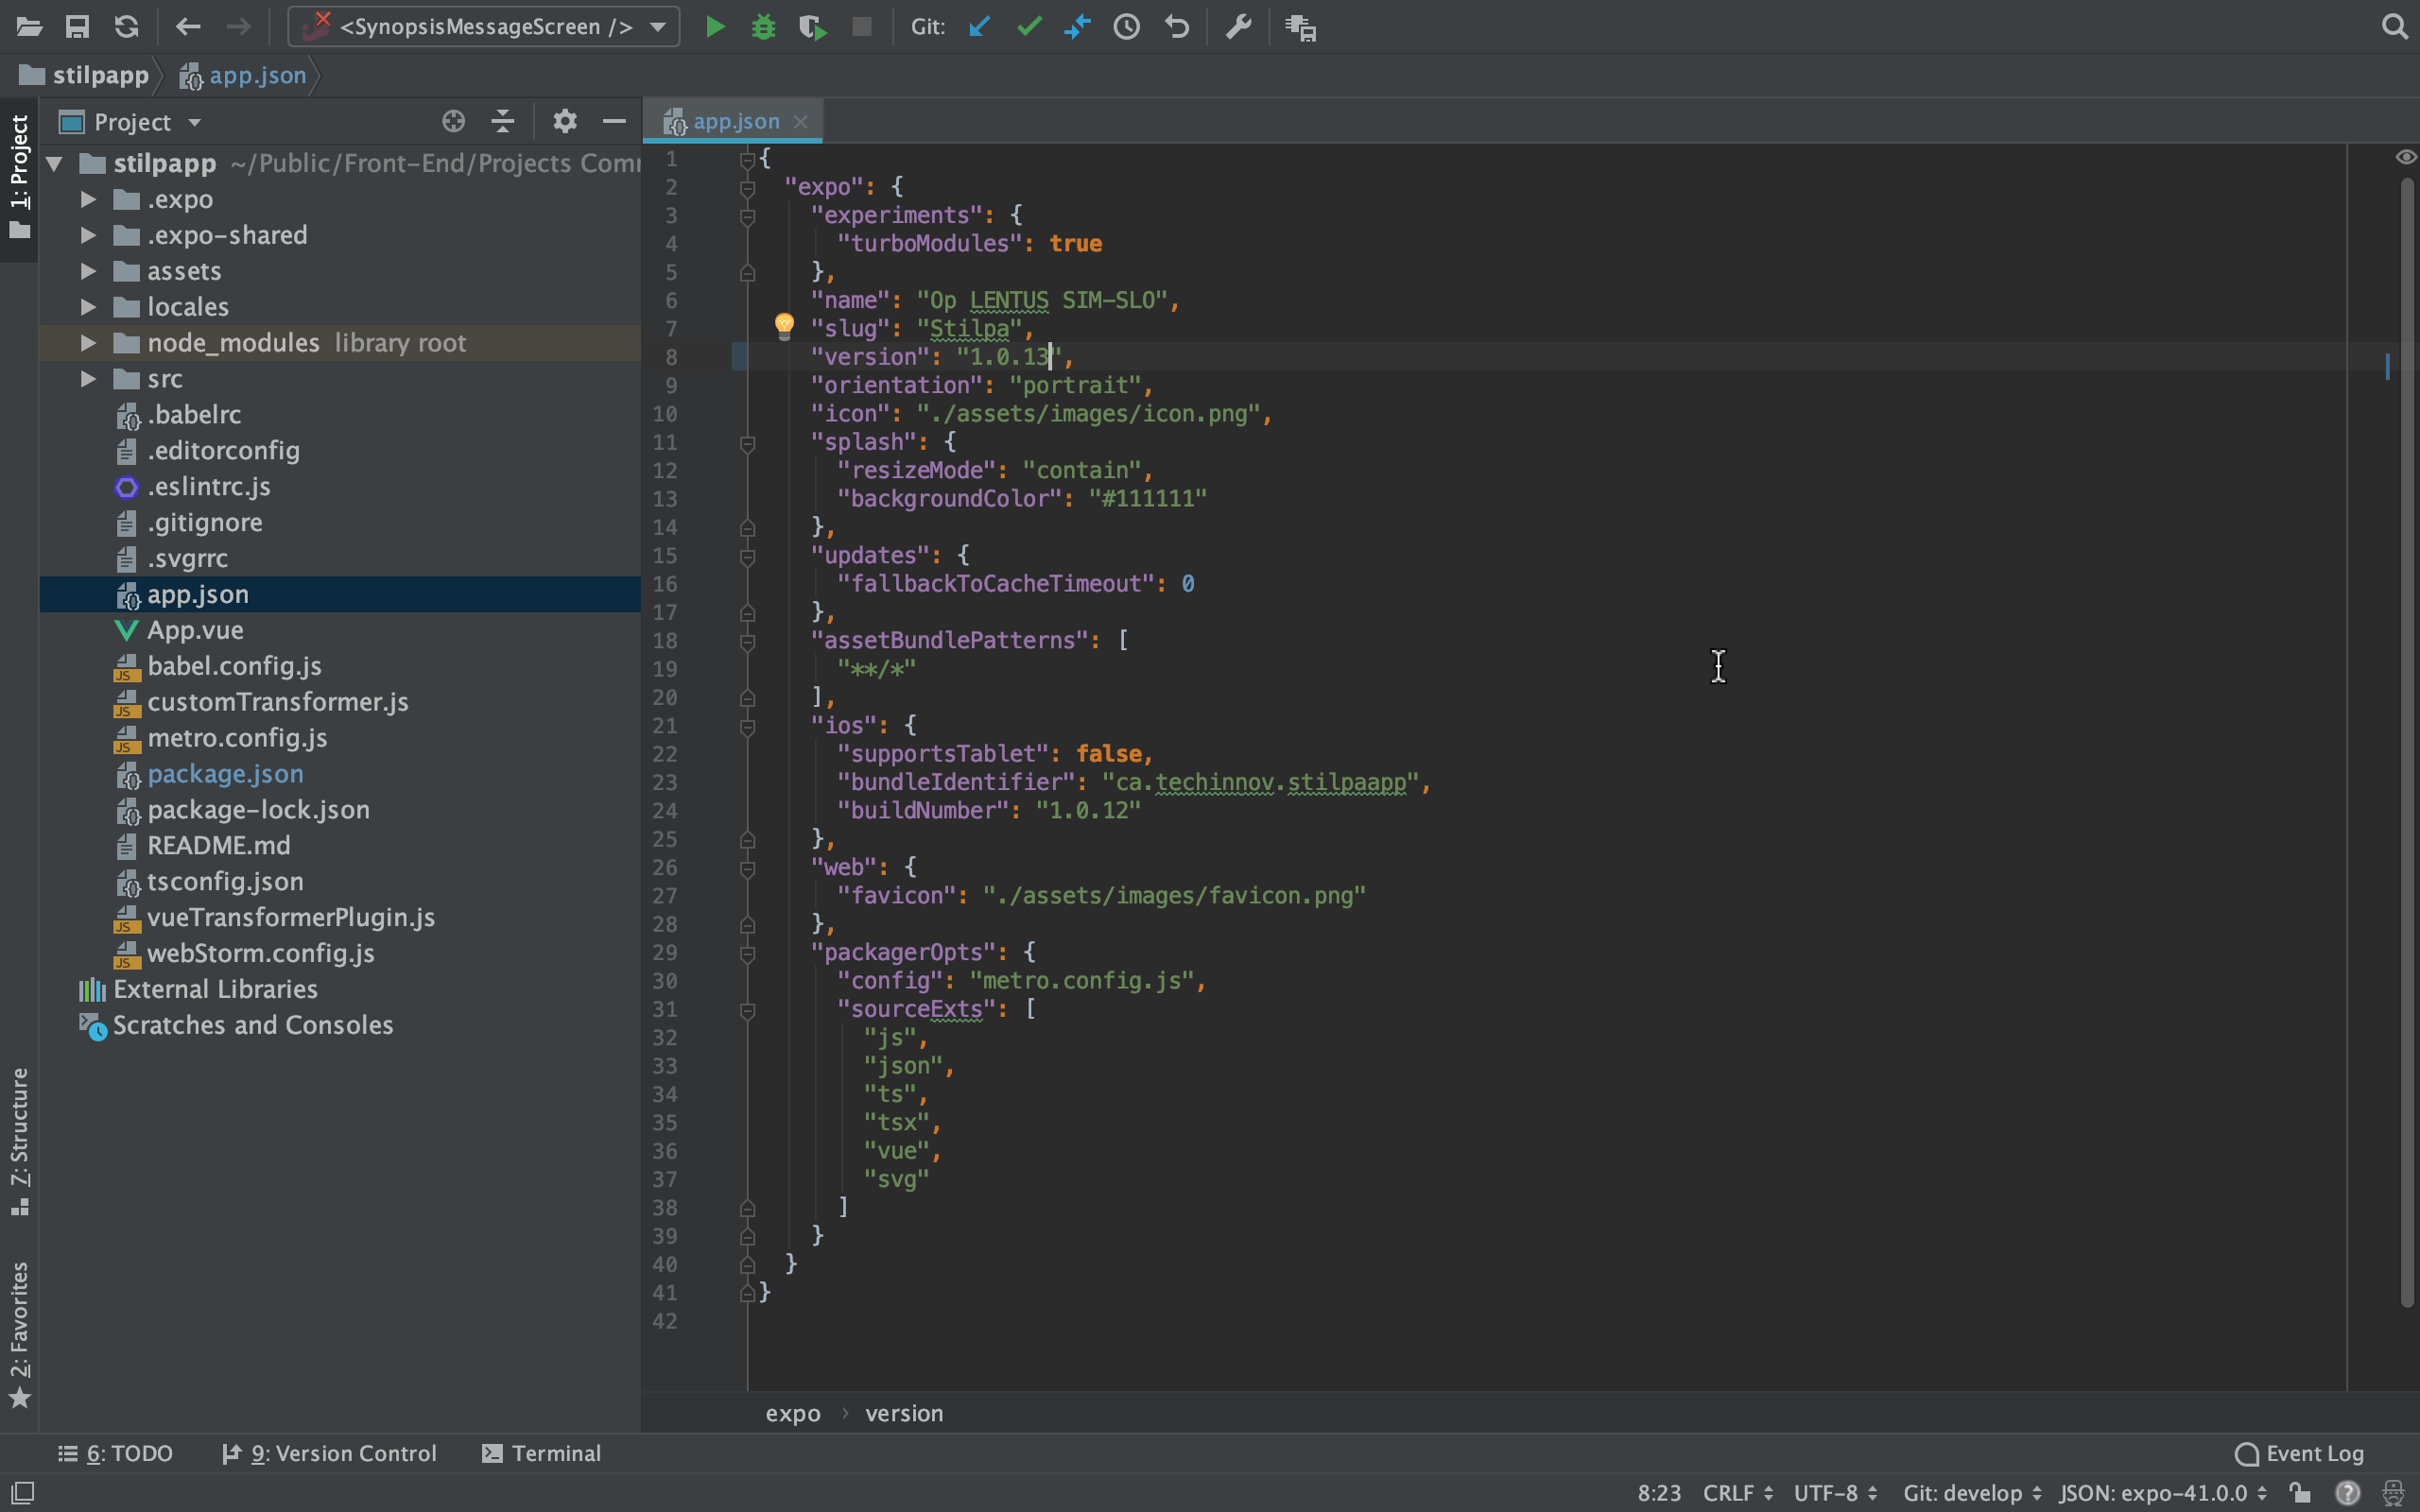
You can also separately configure the application in app.json. This allows you to specify the name and connect the favicon/icon you want to be displayed when the application is loading. Of course, if you’re using Expo, this will be created automatically.
Finally, you just need to register the libraries that you want to connect to.
Deploying Your Application in Expo
As already discussed, you should write scripts for the specific packages you want to build. This means each can be run separately on both IOS and Android.

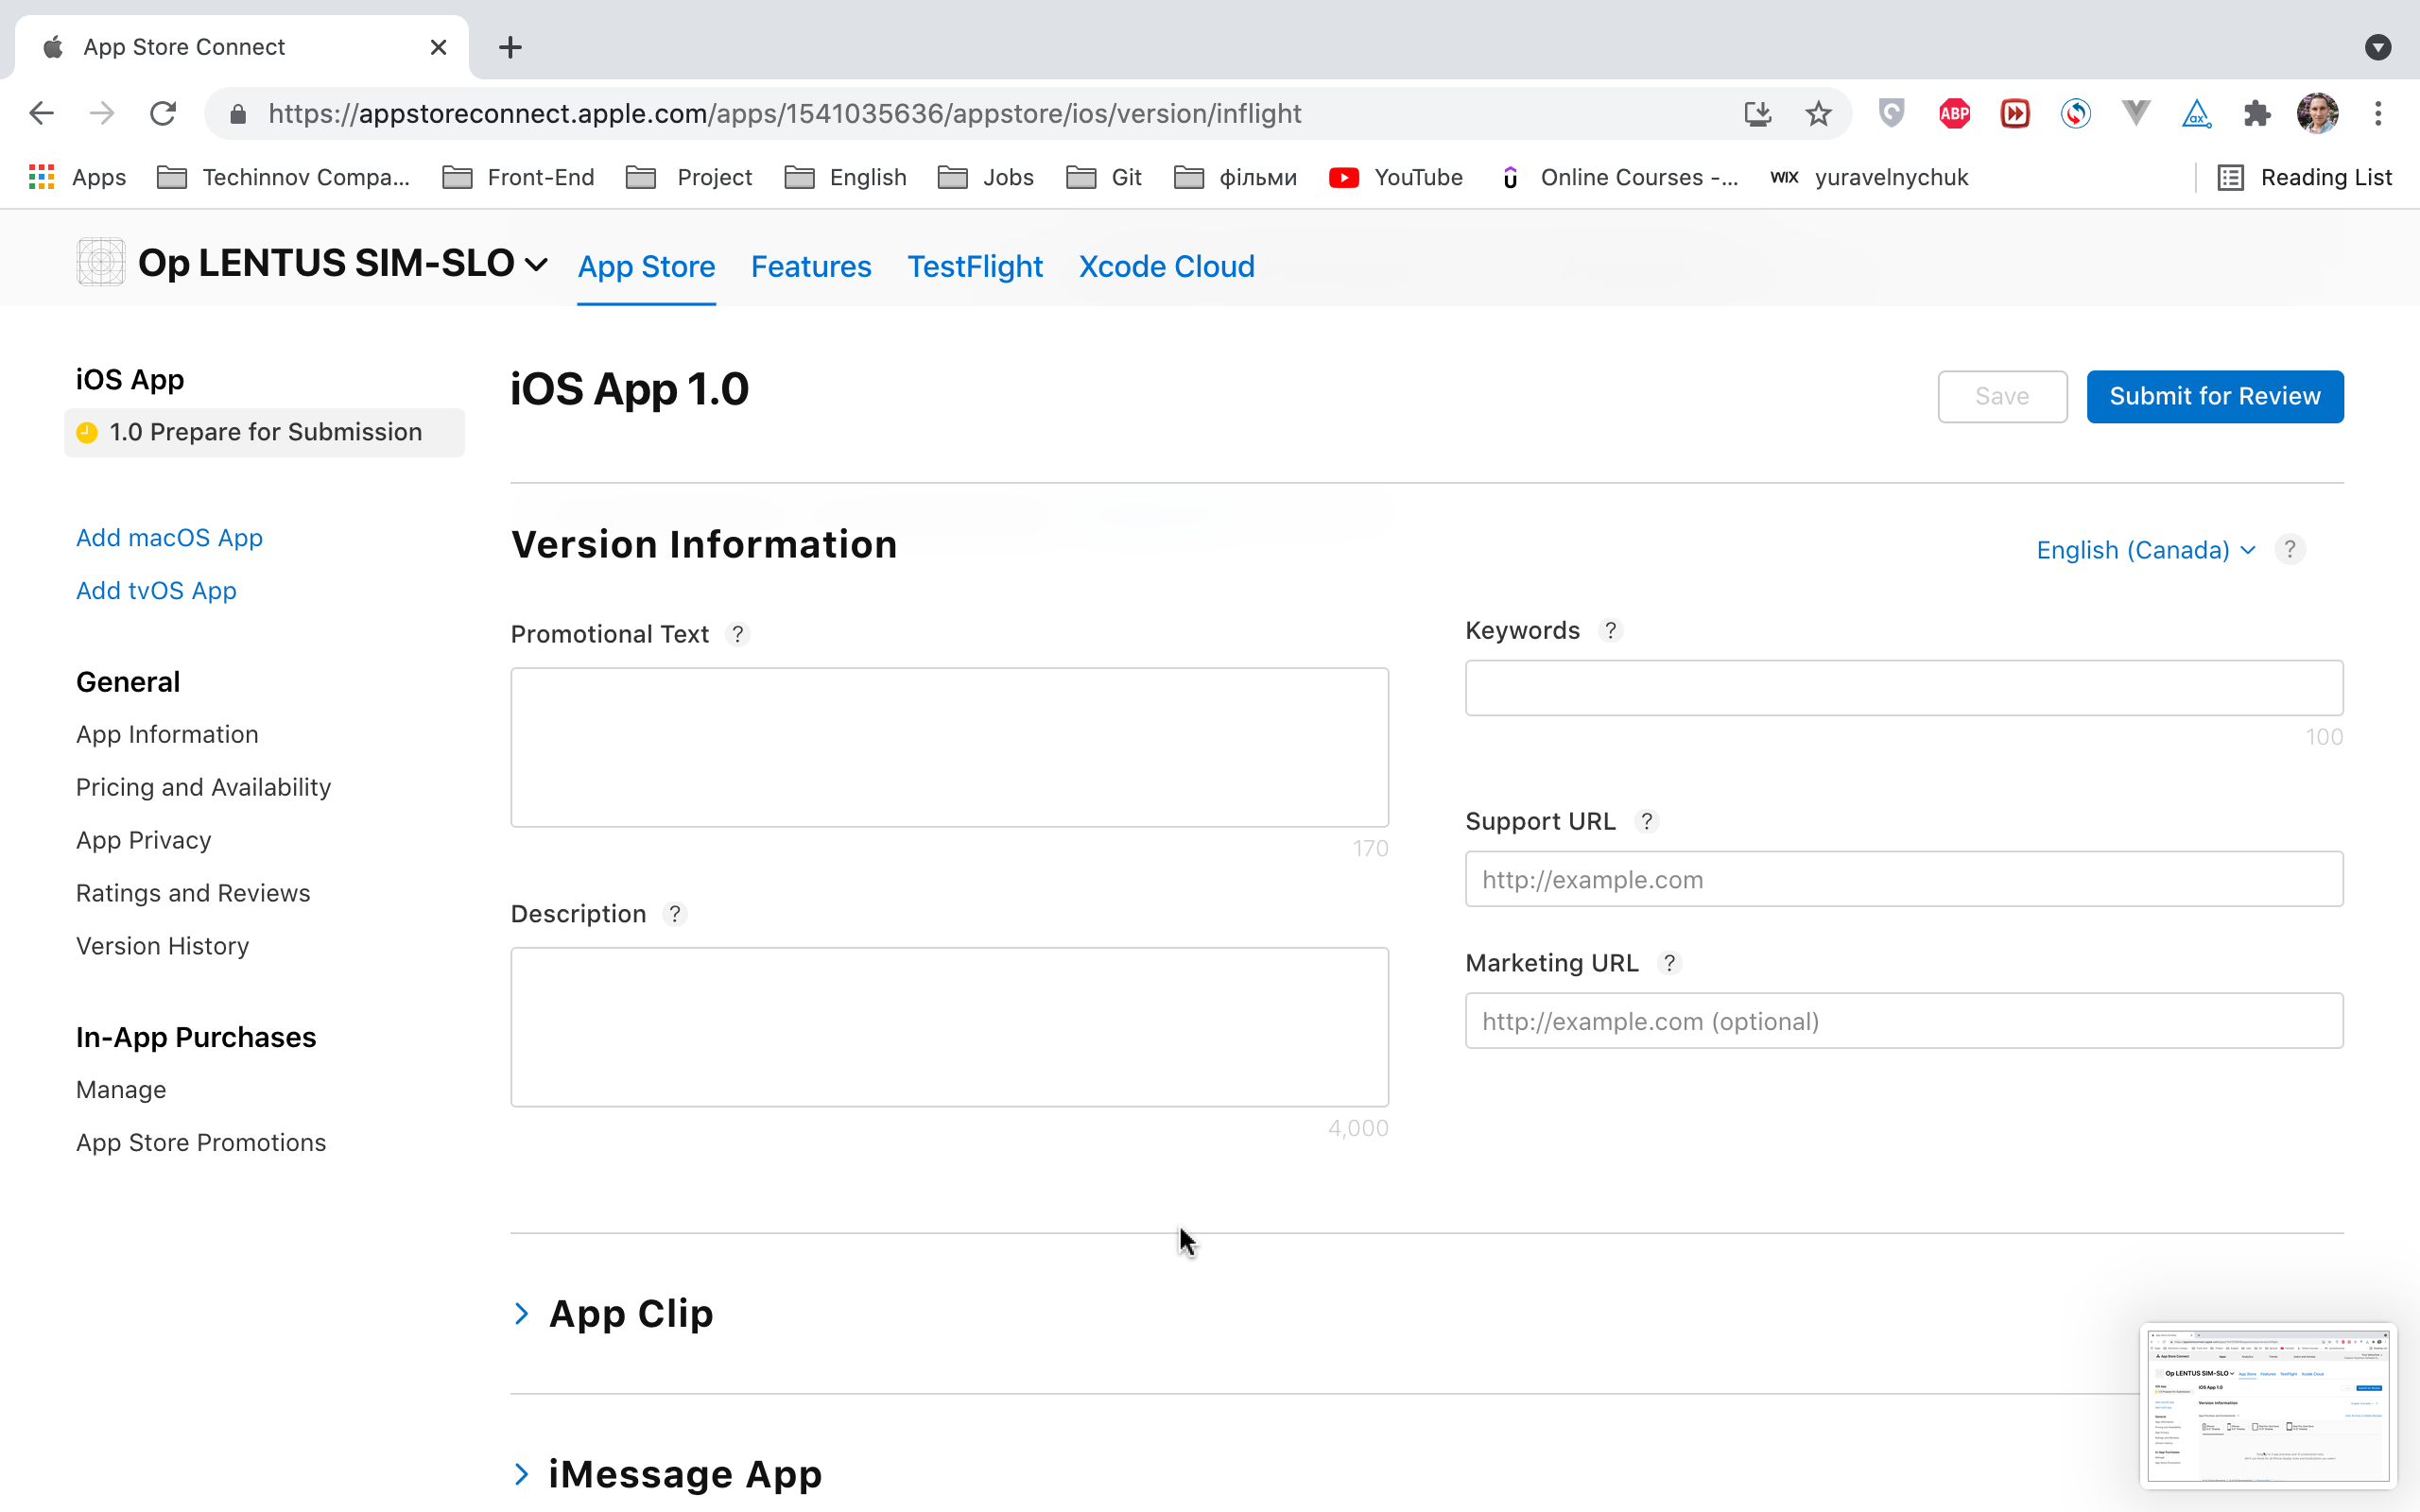
However, you need to understand that you need accounts in order to do this. For example, if the build is for IOS, you must have an account where you can actually create your application. You will also need to describe all the nuances (pictures, screenshots, description) of the app when you create your account.
The same is true of Expo. You must have a developer account in which you can build your project.
Unfortunately, these accounts are not free.
Once you have your account, you can return to the deployment and begin the expo build. Simply use the “build tab” inside Expo to create the new build, which will automatically be embedded into the program. Afterward, you can connect your project.
Subsequently, you will have a downloadable artifact.
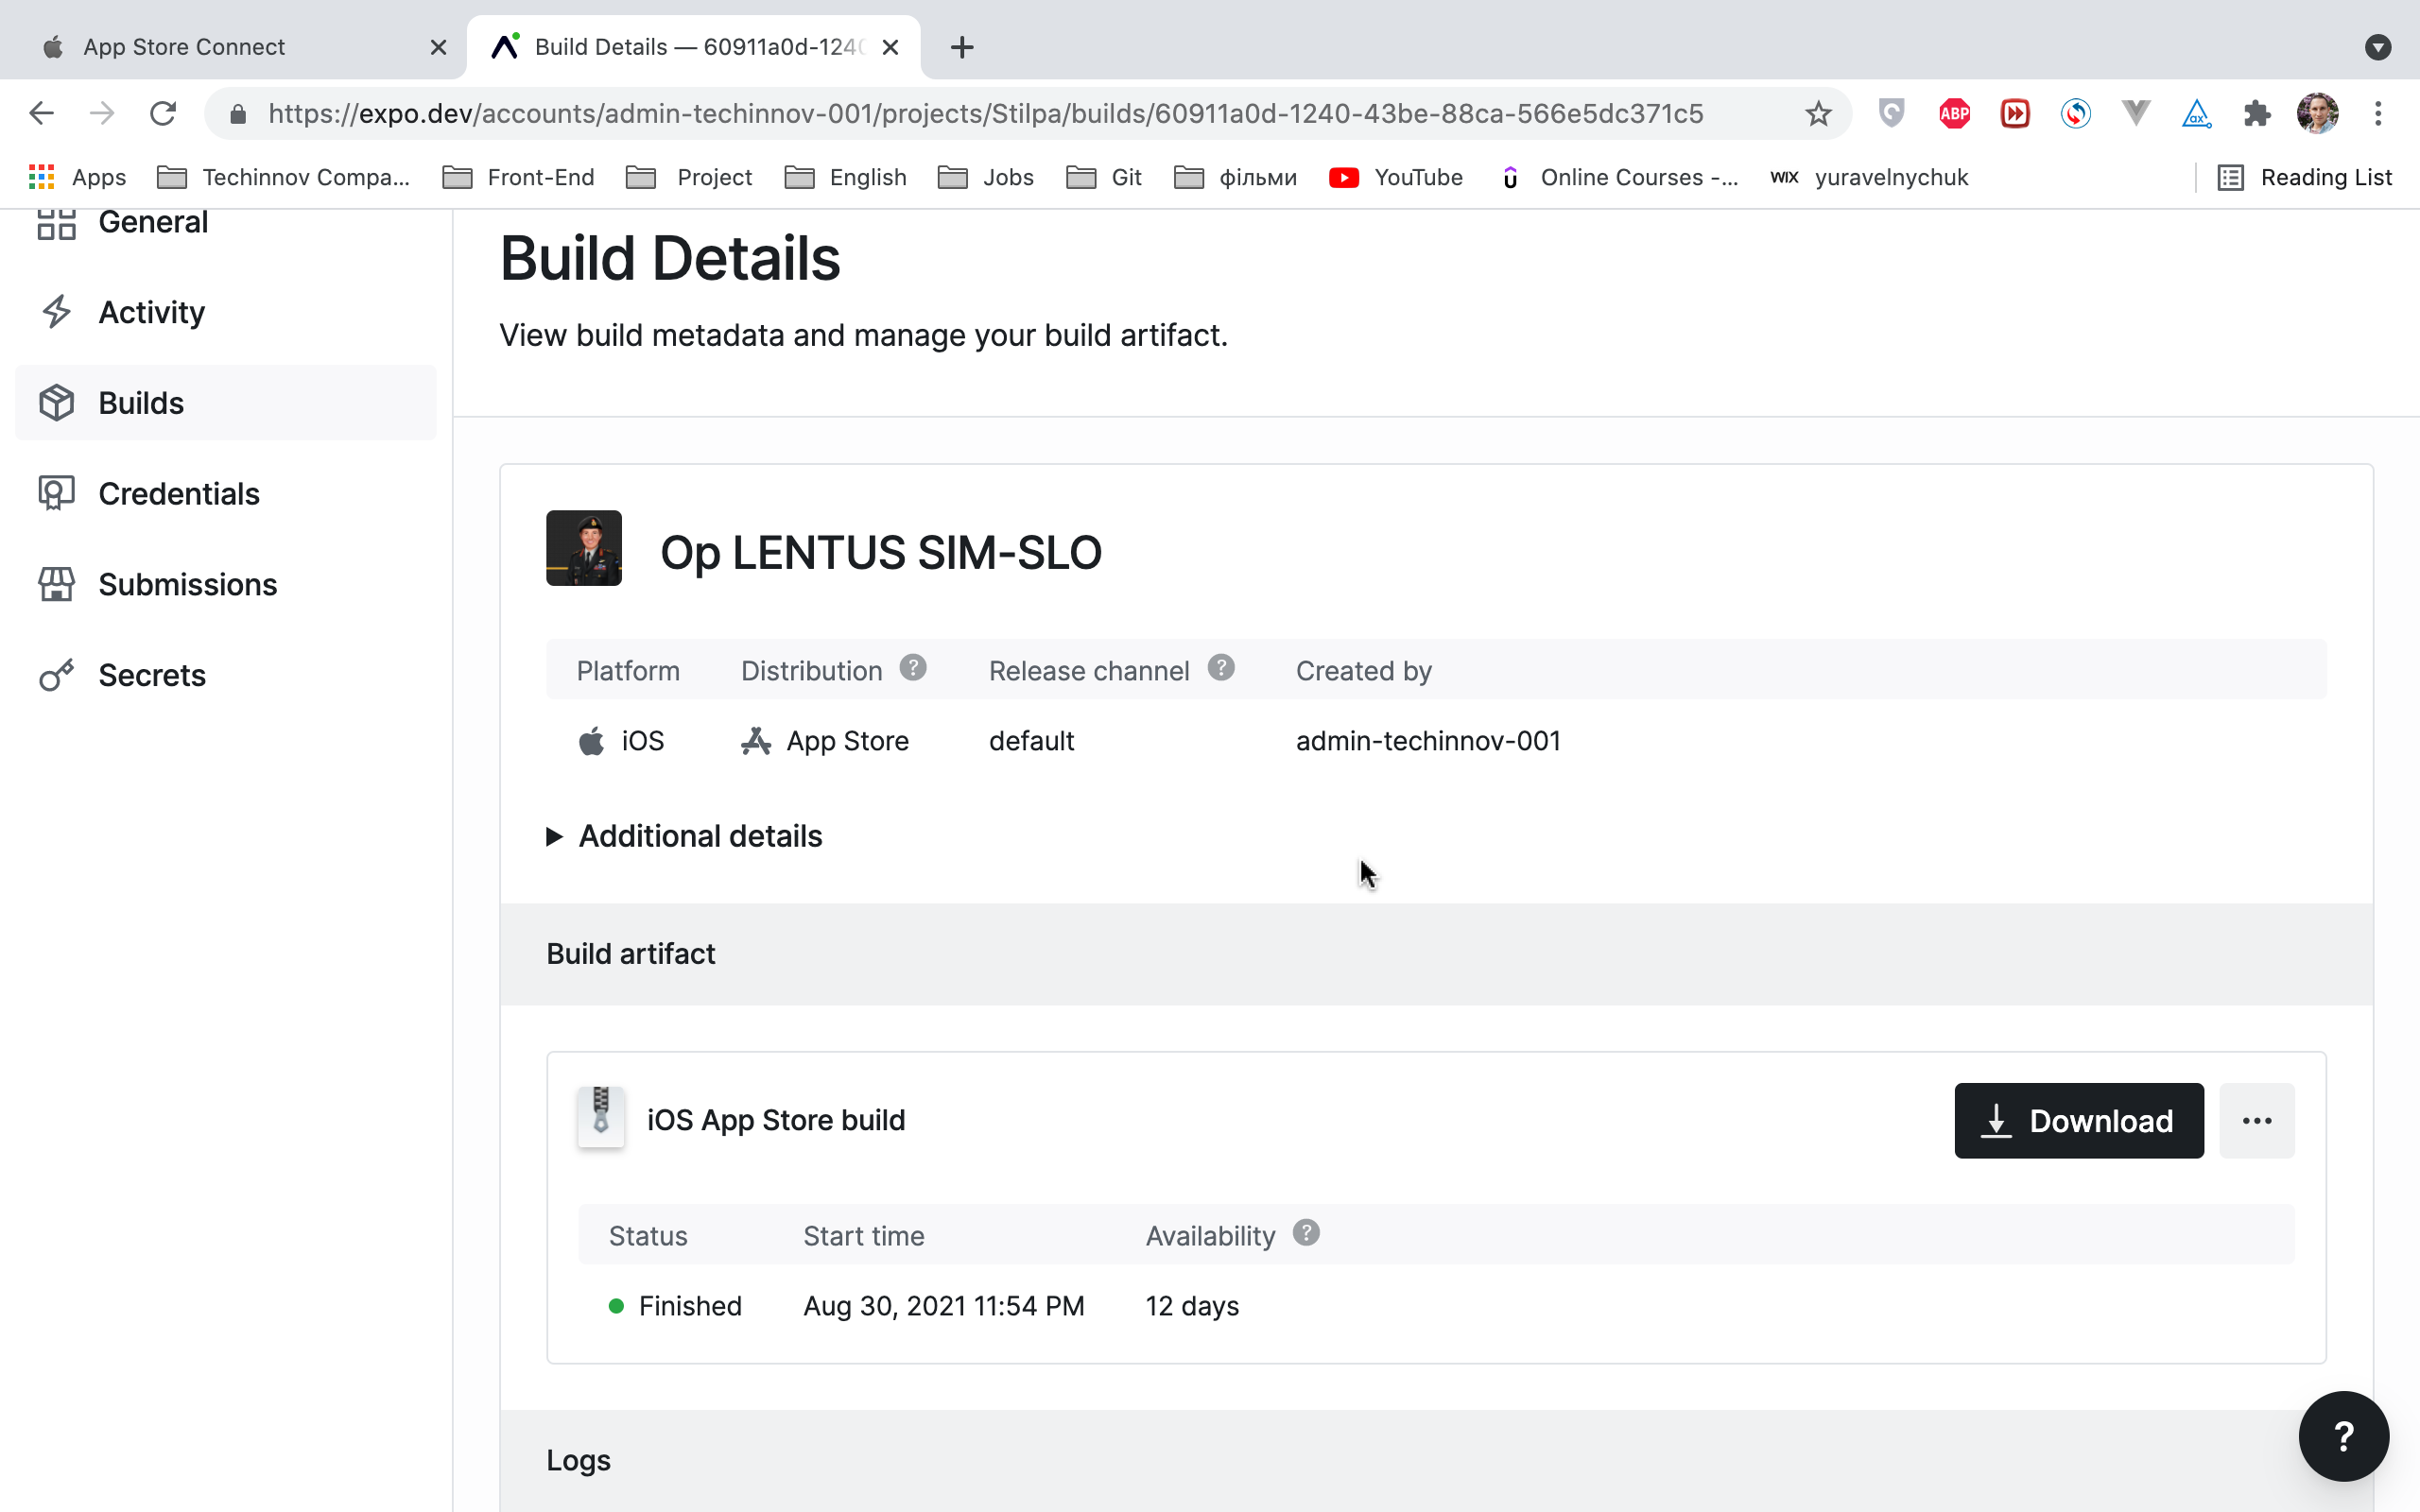
When you first download it, it will be in IPA format. You can then move it into the Test Flight section by inserting the file into the Apple Developer account itself.
Additional Things to Consider
Try to remember that when you start a build, you always need to change the version to add it to a test flight. To do this, go to app.json> version, and specify the new version of each build. If you try to build the same version twice, you will get an error.
And while it is built into Expo, it will not be transferred over to the App Store.
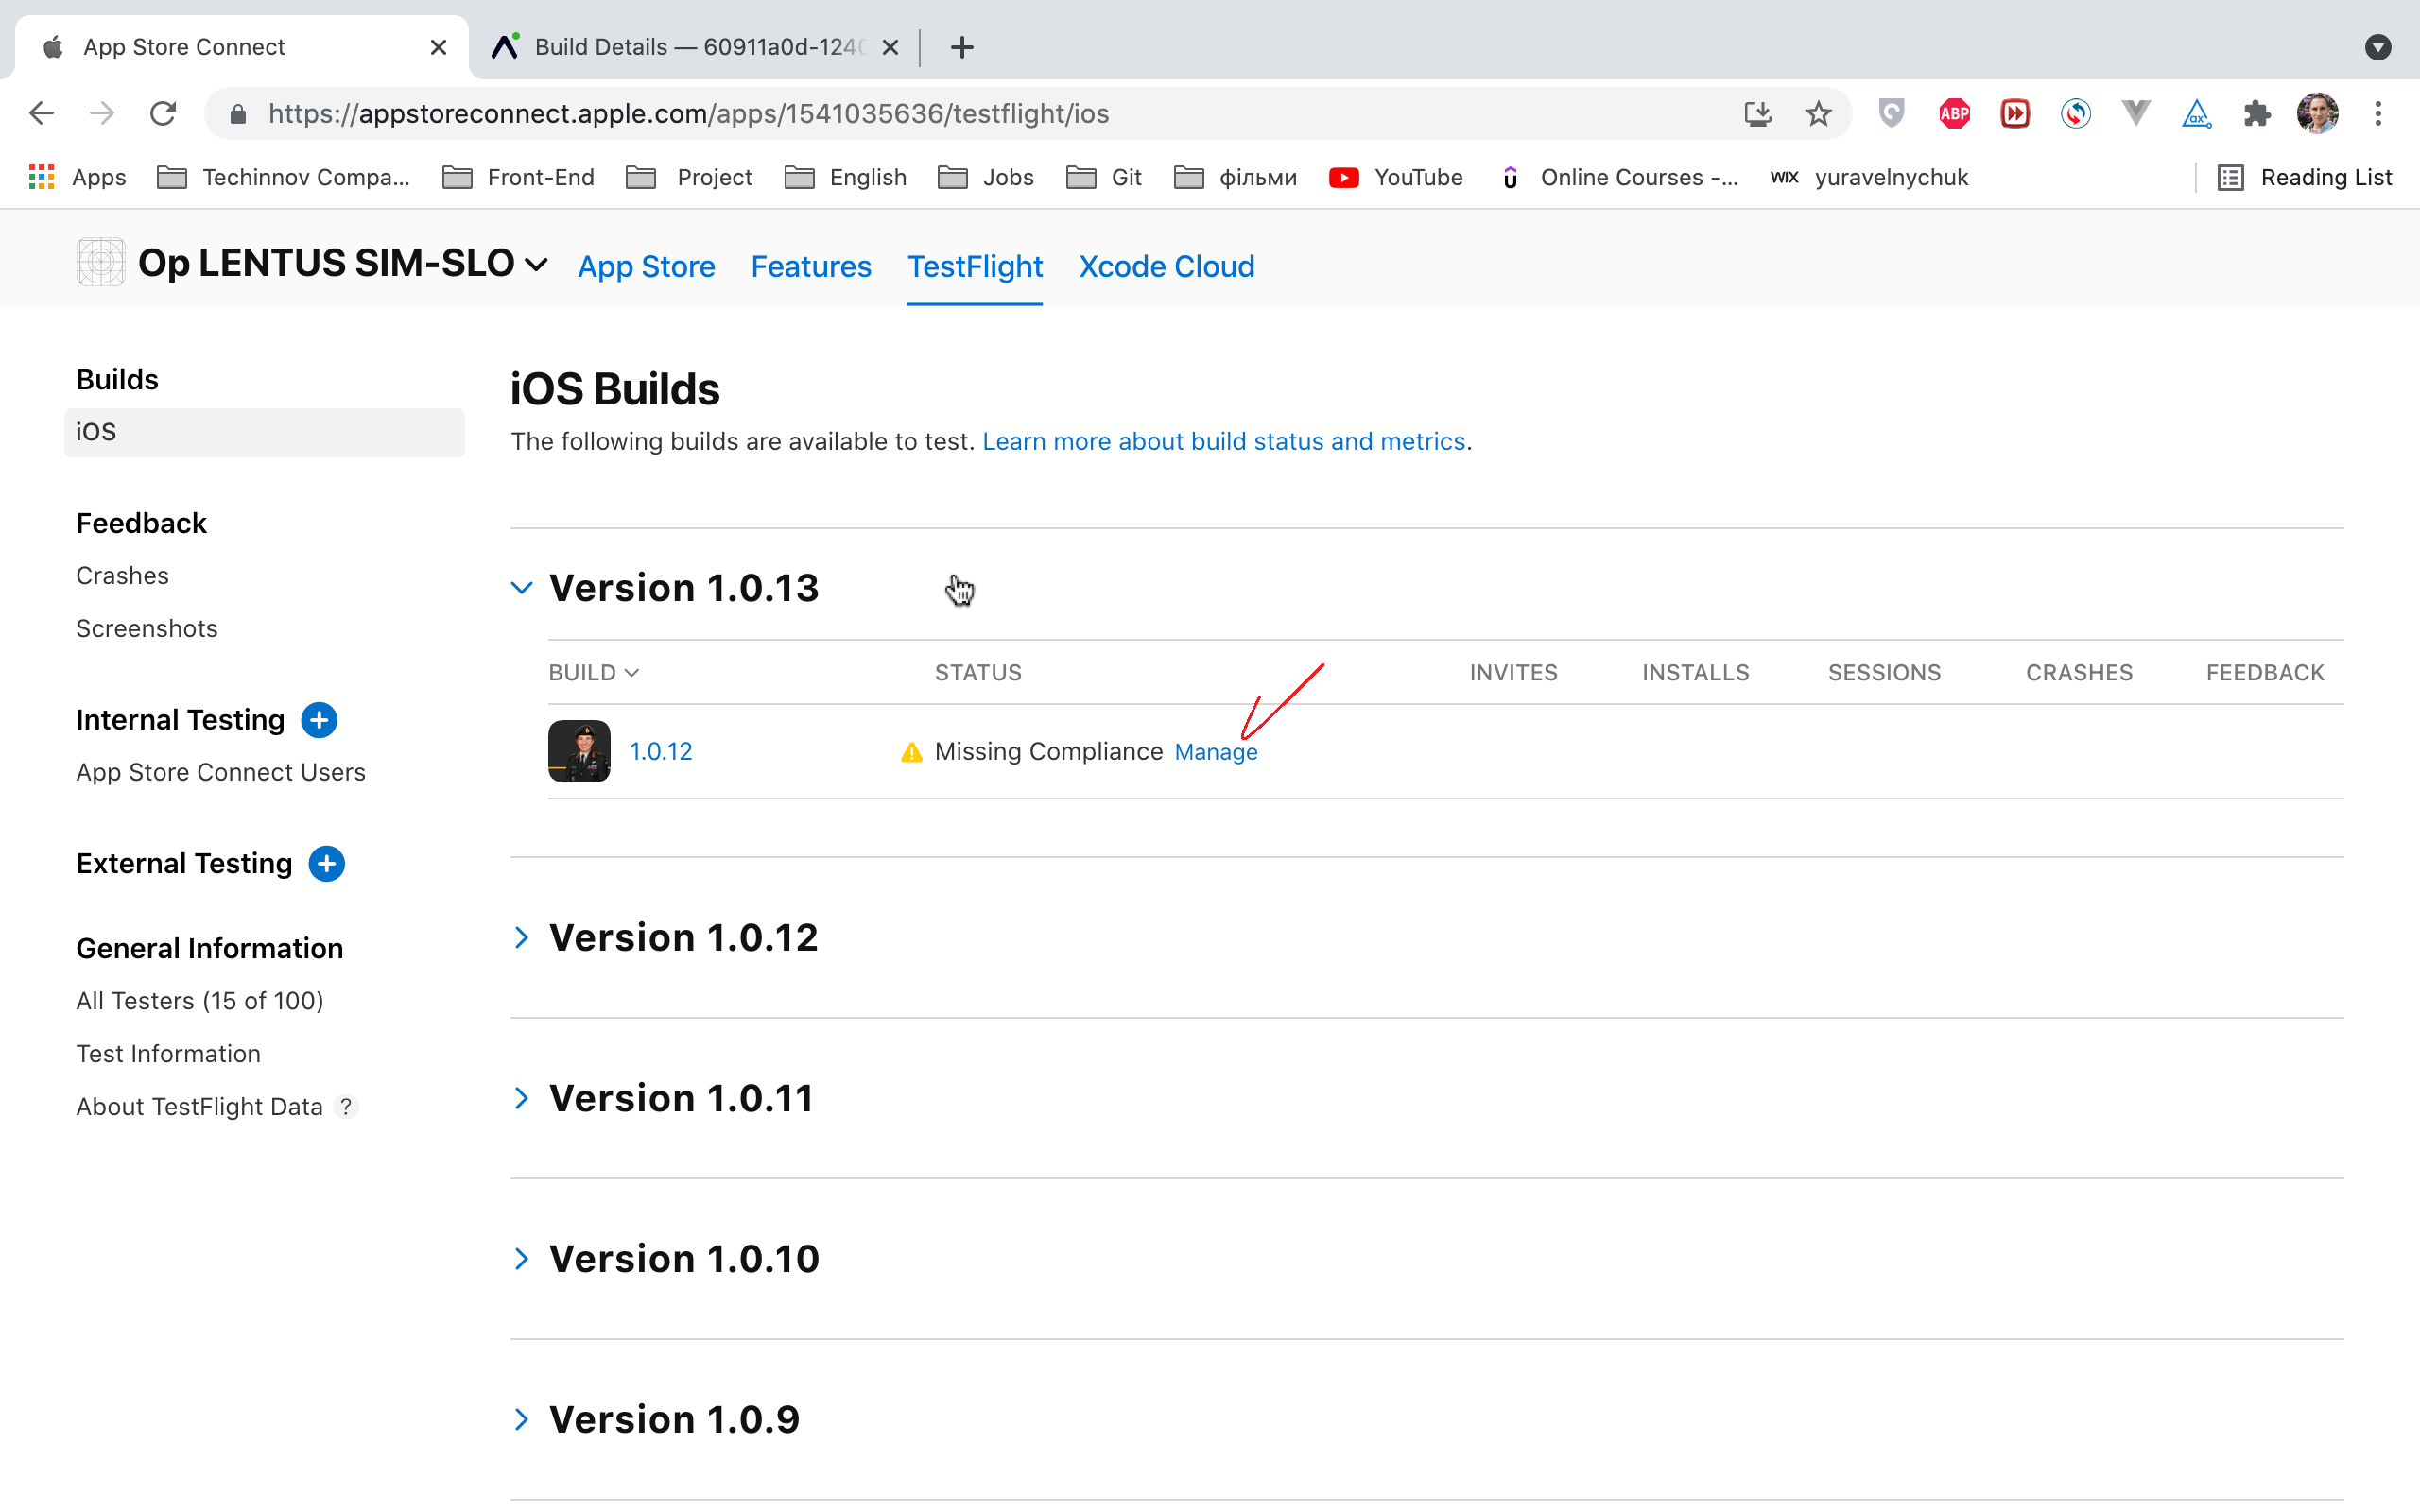
Also, after verifying the project, you will need to click on the “Manage” button. This is where you will answer questions about what your application is for.
When you begin your project, the Expo development tools will open. You will already be running either an Android or IOS simulator, so you can go right into the development itself. Not only can you track it locally, but it is also possible to track it on your phone. To do this, download “Test Flight” and “Expo Go” From the App Store.
Expo allows you to work locally. When you run a project, you can create an Expo Link and a Local Address. Through this link, you will be able to access your Expo application. Simply scan it to get access.
Through TestFlight, you get access to the AppStore. That is, your app will be added to TestFlight after the build. You then verify it, change the platform, and download an application with which you can work.
This looks almost exactly like the app from the store, but is designed for local use by programmers. This is incredibly convenient if you need to use a special type of Device API, like geolocation or the camera. When emulating, these devices are not easy to enable or test. In fact, in the case of voice-over, you can’t emulate it at all.
When you’re ready to manage your release in the AppStore, you need to describe your app in great detail.
Remember that the AppStore team will check every point in this form to make sure it’s in accordance with their rules. If an error occurs, everything is rejected. That’s why it’s vital that you fill in each field correctly.
Observations
During the development of the Op LENTUS SIM-SLO app, our team found it quite difficult to work with animation. When they connected to Vue Native animation, it was shown to be available locally. However, once they attempted to build or deploy, the option disappeared. We recommend working with React animation instead – at least until a patch for this problem is released.
When it comes time to install the artifact through Expo, it can be difficult to accomplish this in automatic mode. Many developers attempt to fix this by using Azure to create a pipeline. However, Expo is currently developing a beta version for automatic deployment. Unfortunately, it is only in the beta stages, and you will have to pay for access to it.
It’s also important to remember that if you work on Windows, you can’t install the IOS simulator. In order to work on IOS, you need to access the App Store and download Xcode, which can only be found there. On mac OS you can work with both IOS and Android without any issues.
Conclusion
Vue Native is one of the most interesting mobile frameworks in app development. However, it is not perfect. Indeed, navigating the app development process continues to be a difficult and sometimes frustrating endeavor. At InventorSoft, we strive to reduce development costs, speed up start times, and get you from MVP to a full-scale product as fast as possible. If you’re a startup or established SaaS company looking for Vue Native development, InventorSoft is here to help. Contact us today to learn more.
Related articles

12 Supply Chain Technology Trends To Watch In 2023

The Discovery Phase of a Software Development Project: What It Is and Why You Need It

8 Crucial Supply Chain Management Software Requirements
- What is Vue Native?
- Getting Started with Cross-platform Mobile App Development
- Use Vue Native to Start Building Your Project
- An Introduction to the Vue Native UI Components
- Understanding the Vue Native Router
- Deploying Your Application in Expo
- Additional Things to Consider
- Observations
- Conclusion